The Idea
The knitting accessories are numerous.
They can also be expensive, and when you visit a specialized website, you may be tempted to buy things you don't need or believe you need due to lack of experience and more. I speak from experience; I have some accessories in my cart that haven't been used more than once.
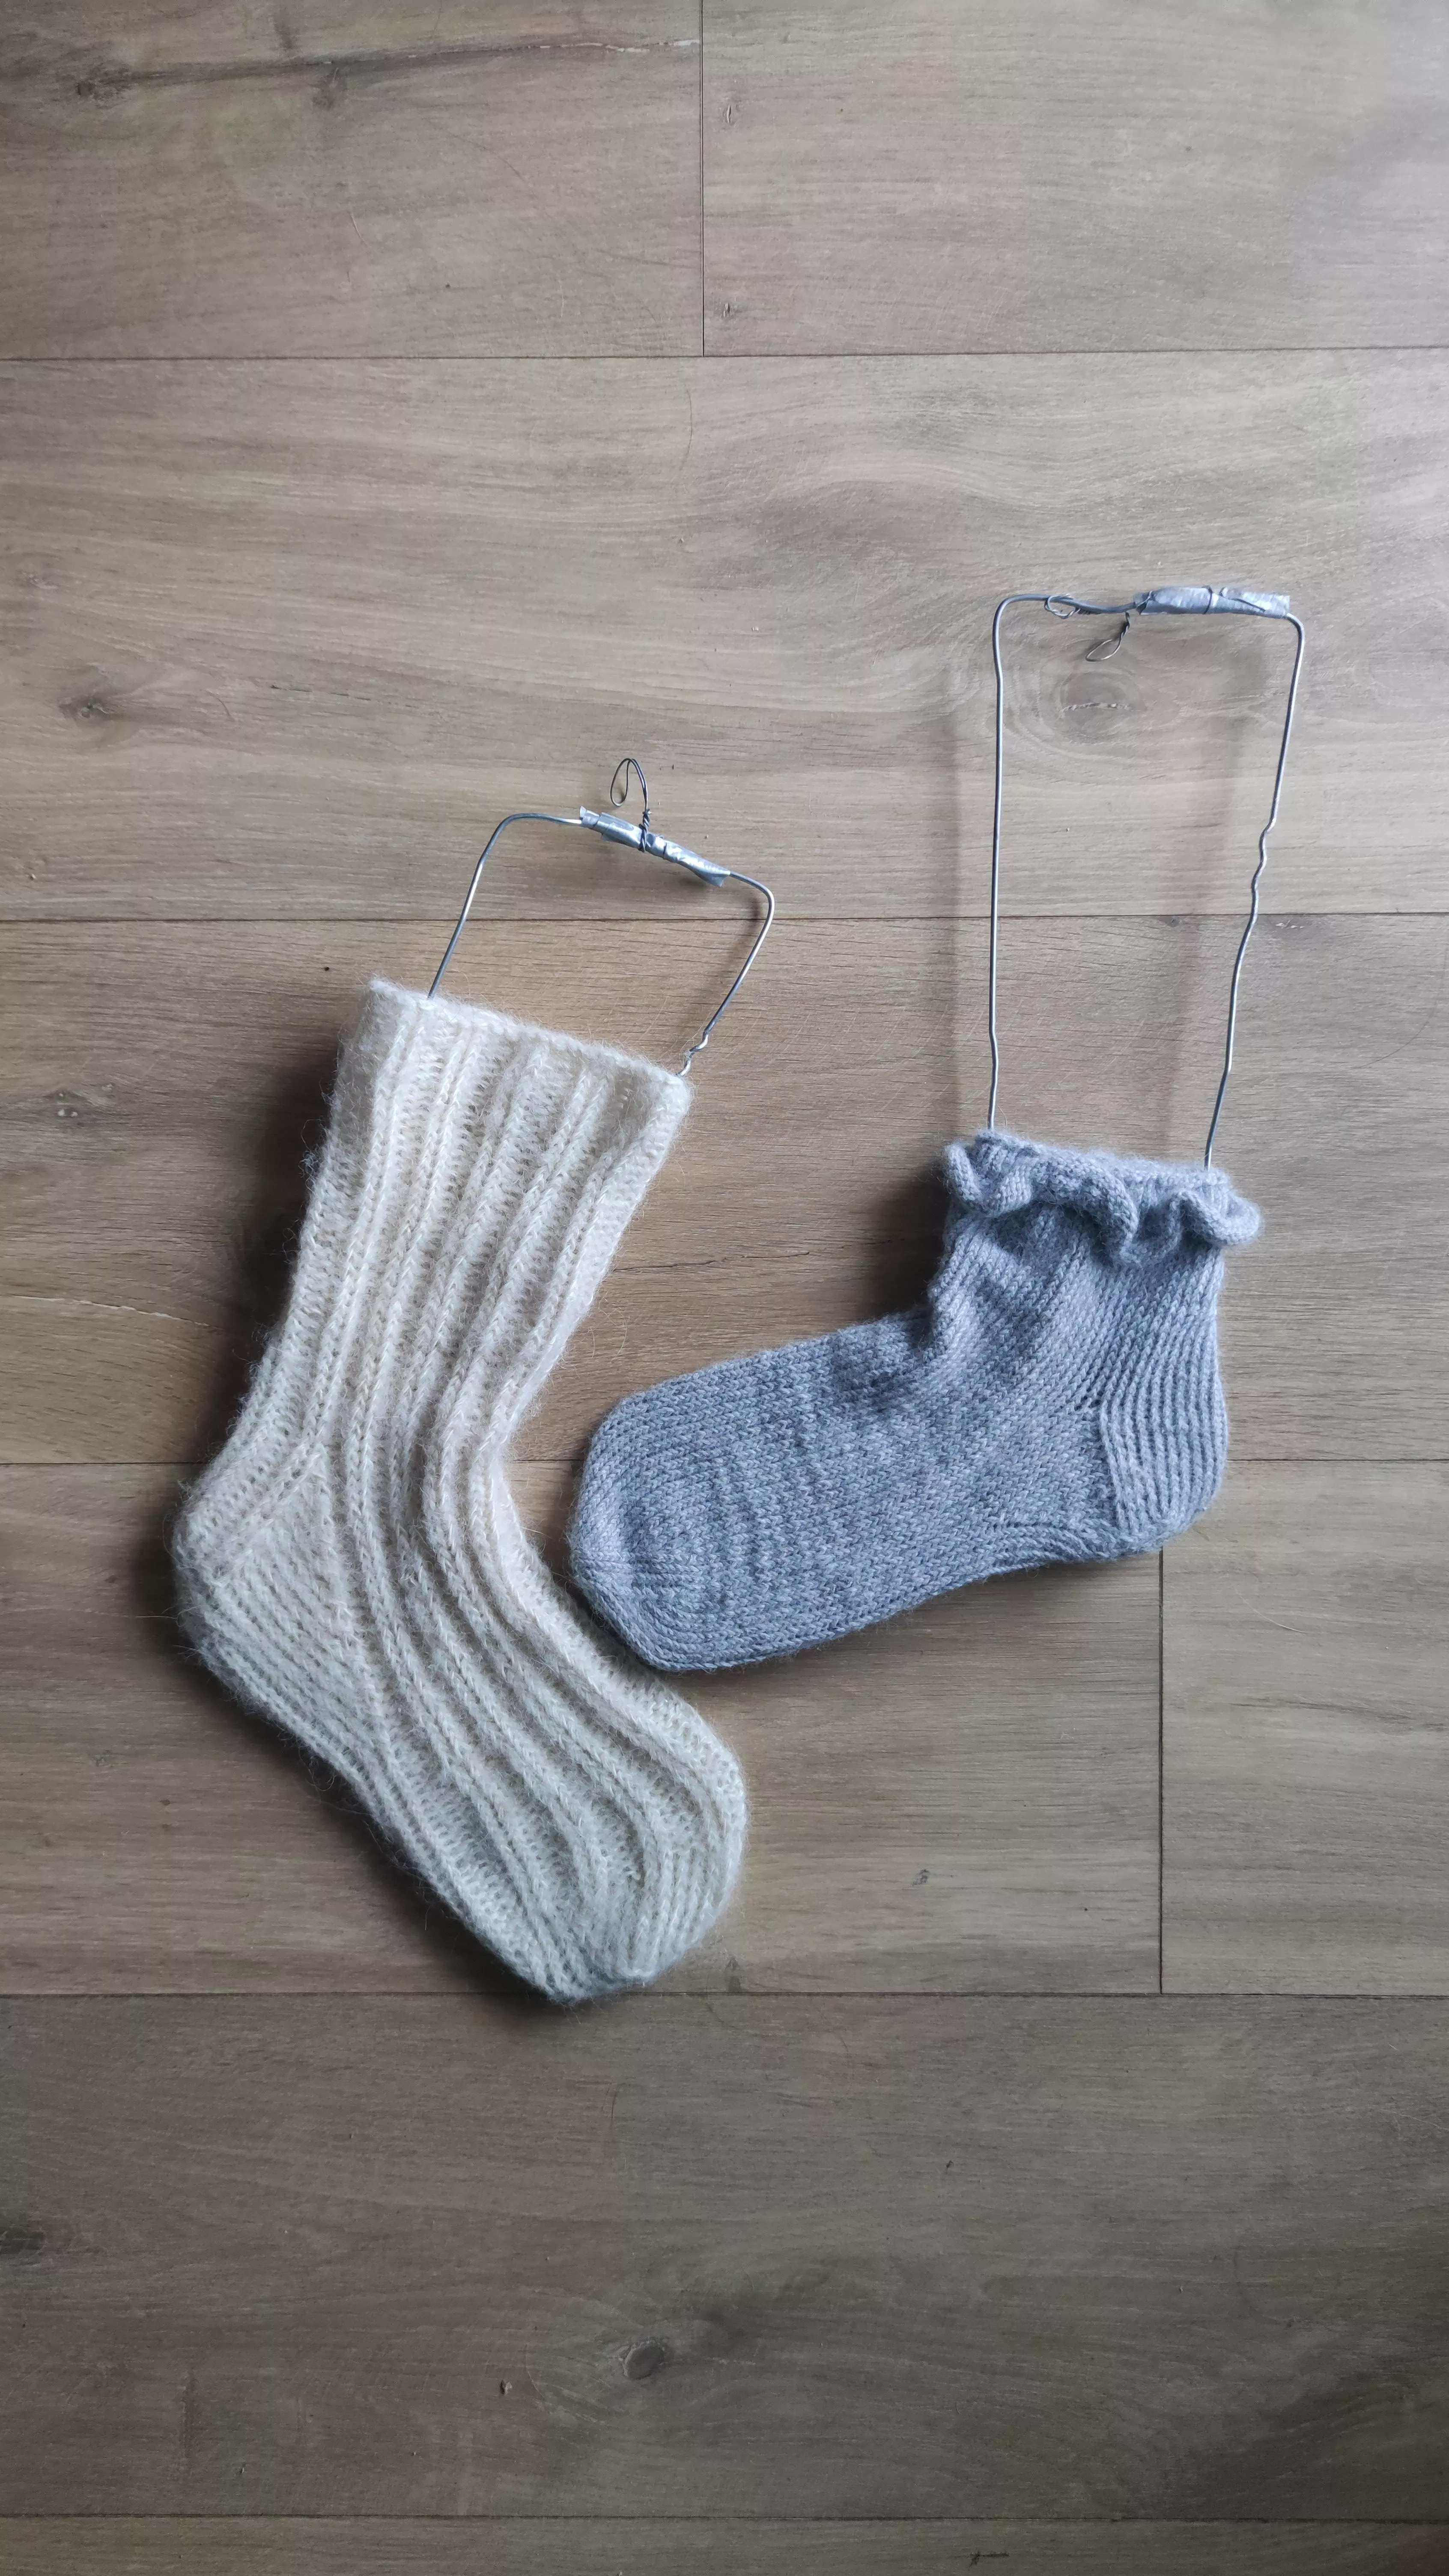
Sock blockers are not essential. You can manage well with regular pins or combs. However, if you enjoy regularly knitting socks for yourself or others, they are still very useful to ensure a quick and uniform drying of both socks.
But it's an accessory that is very easy to make yourself with supplies available at home. There's no need to buy products made on the other side of the earth from discount websites when you can create them yourself.
So, let's get started, let's create a sock blocker together!
PS: This tutorial is also available in video format on my YouTube channel, so feel free to check it out for more details: https://youtu.be/RGsIFF3Qa4s
Measurements Taking
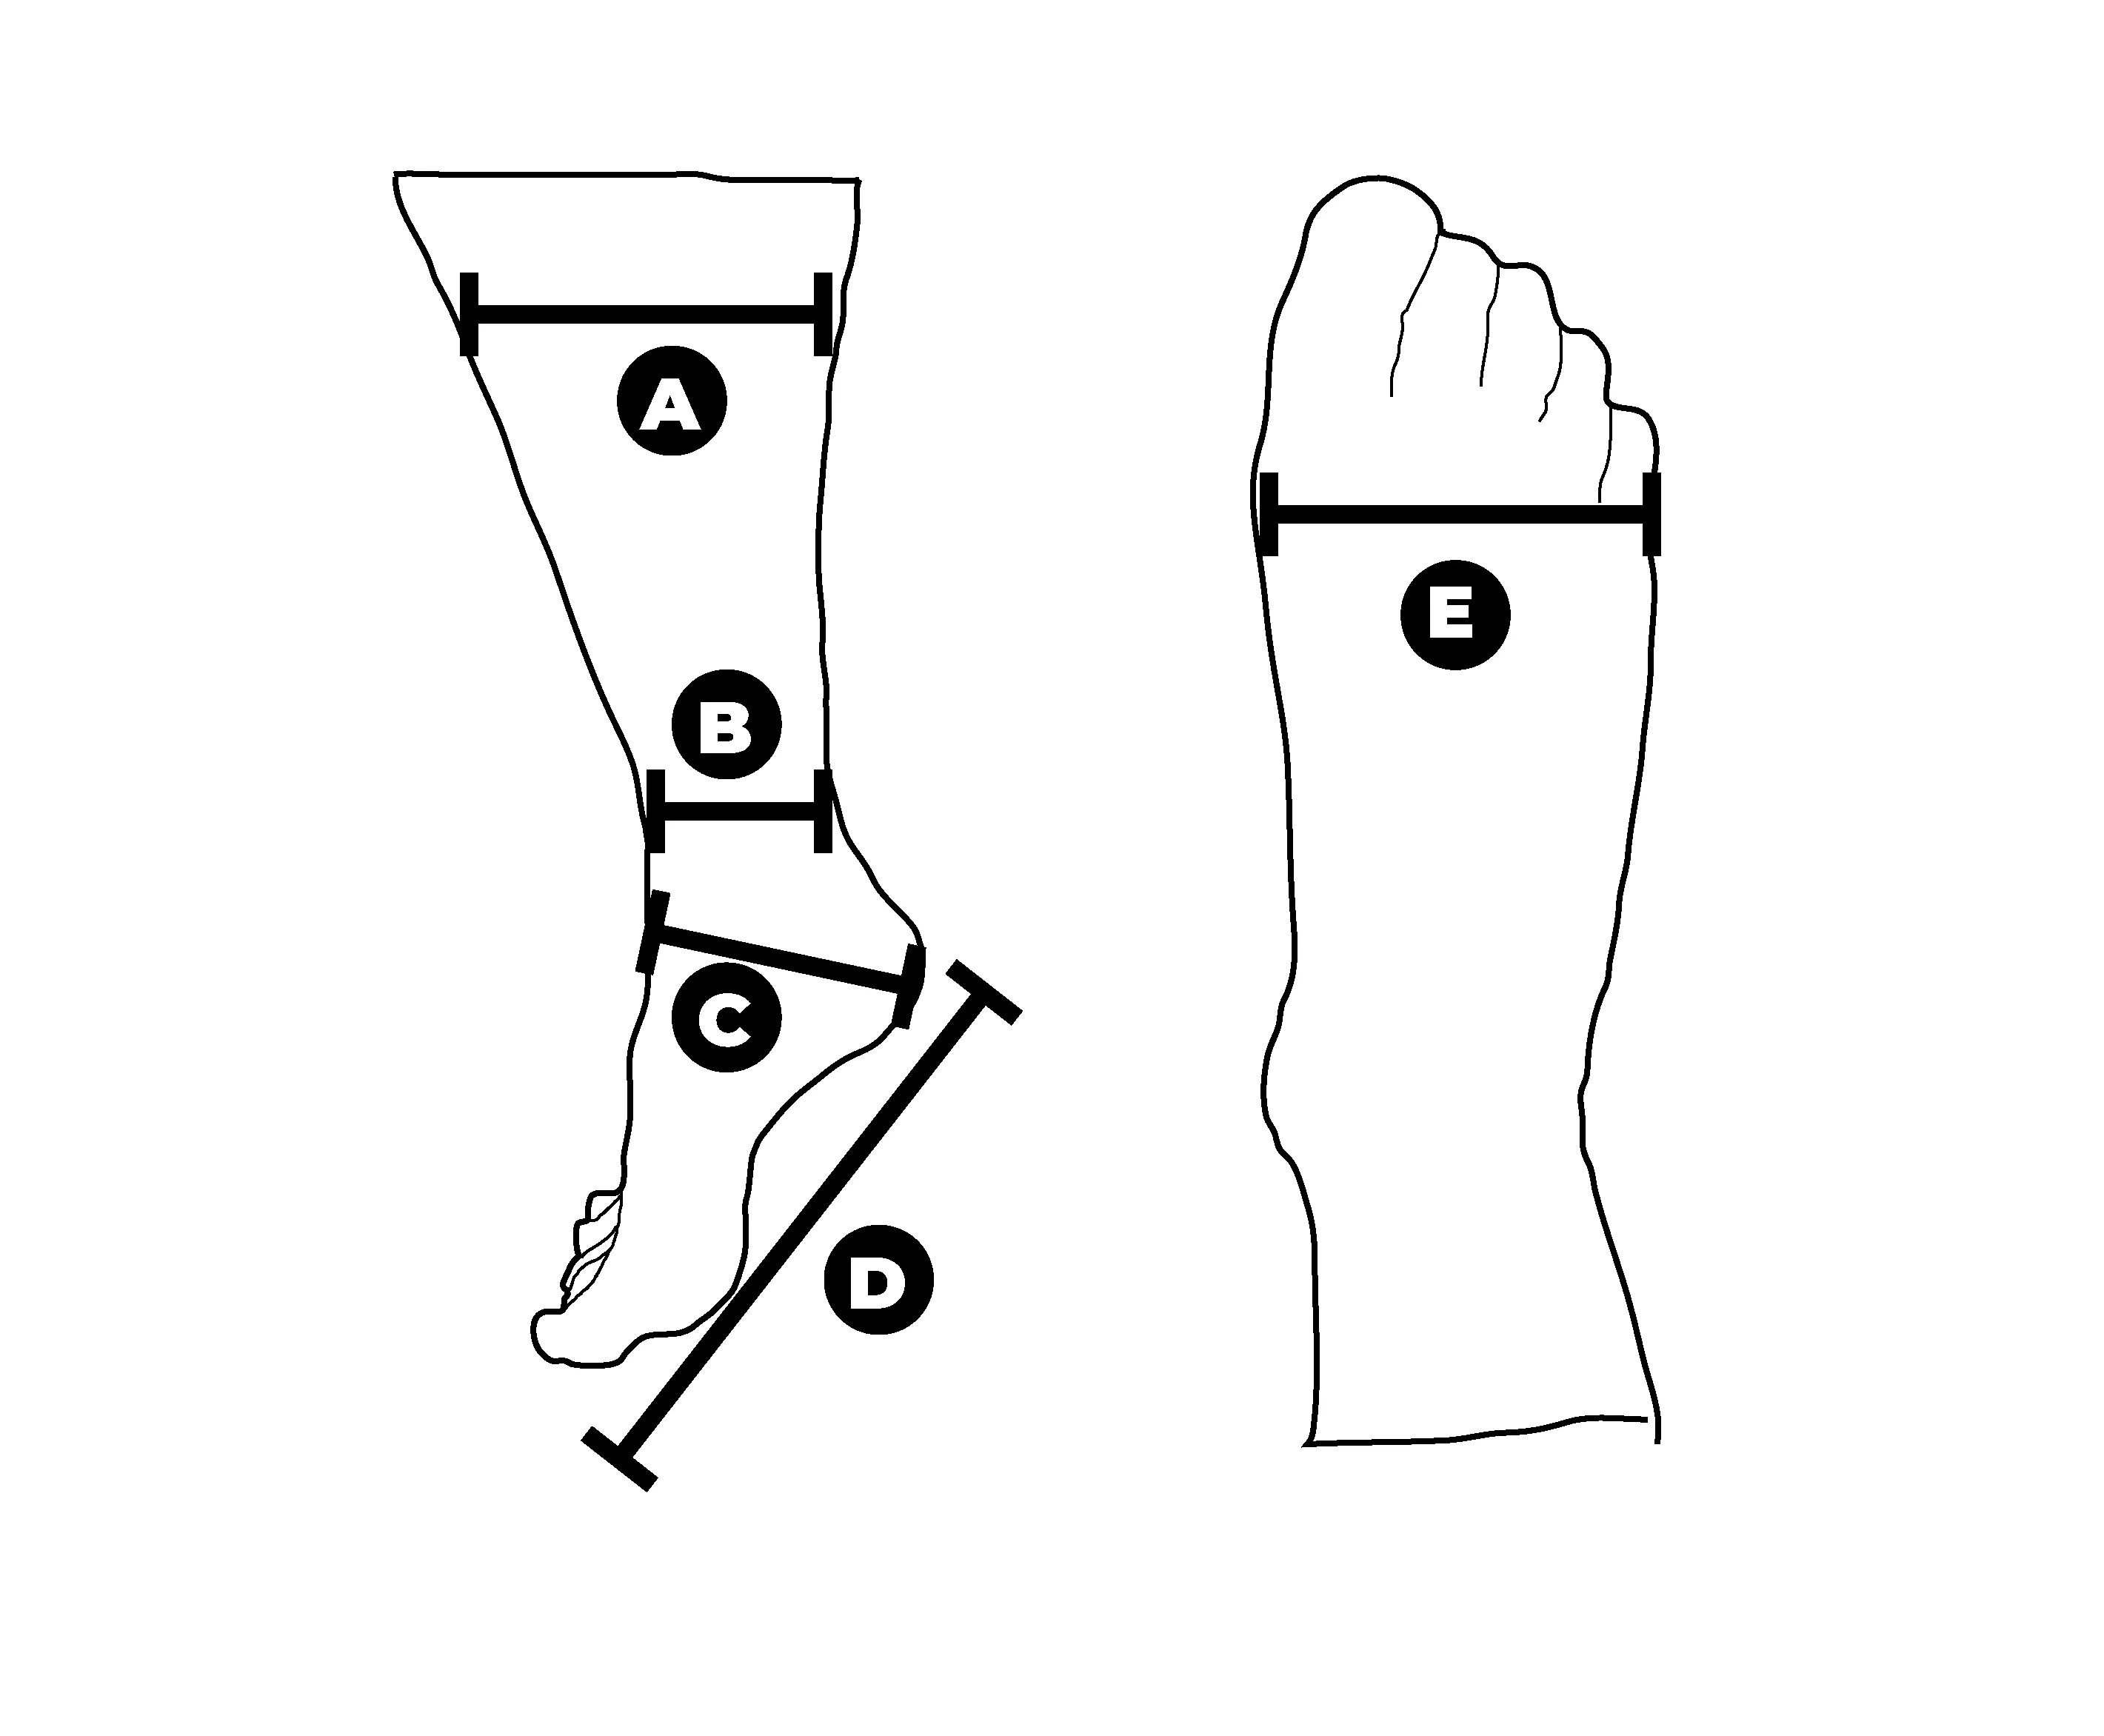
Begin by measuring your leg and foot using a tape measure:
- Firstly, measure the circumference of your calf. This is measurement A.
- Next, measure the circumference of your ankle. This is measurement B.
- Then, measure the distance from the fold between your leg and foot to your heel, passing through the ankle bone. This is measurement C.
- Afterward, measure the length of your foot from underneath. This is measurement D.
- Finally, measure the circumference of the widest part of your foot. This is measurement E.
The Instructions For The Model
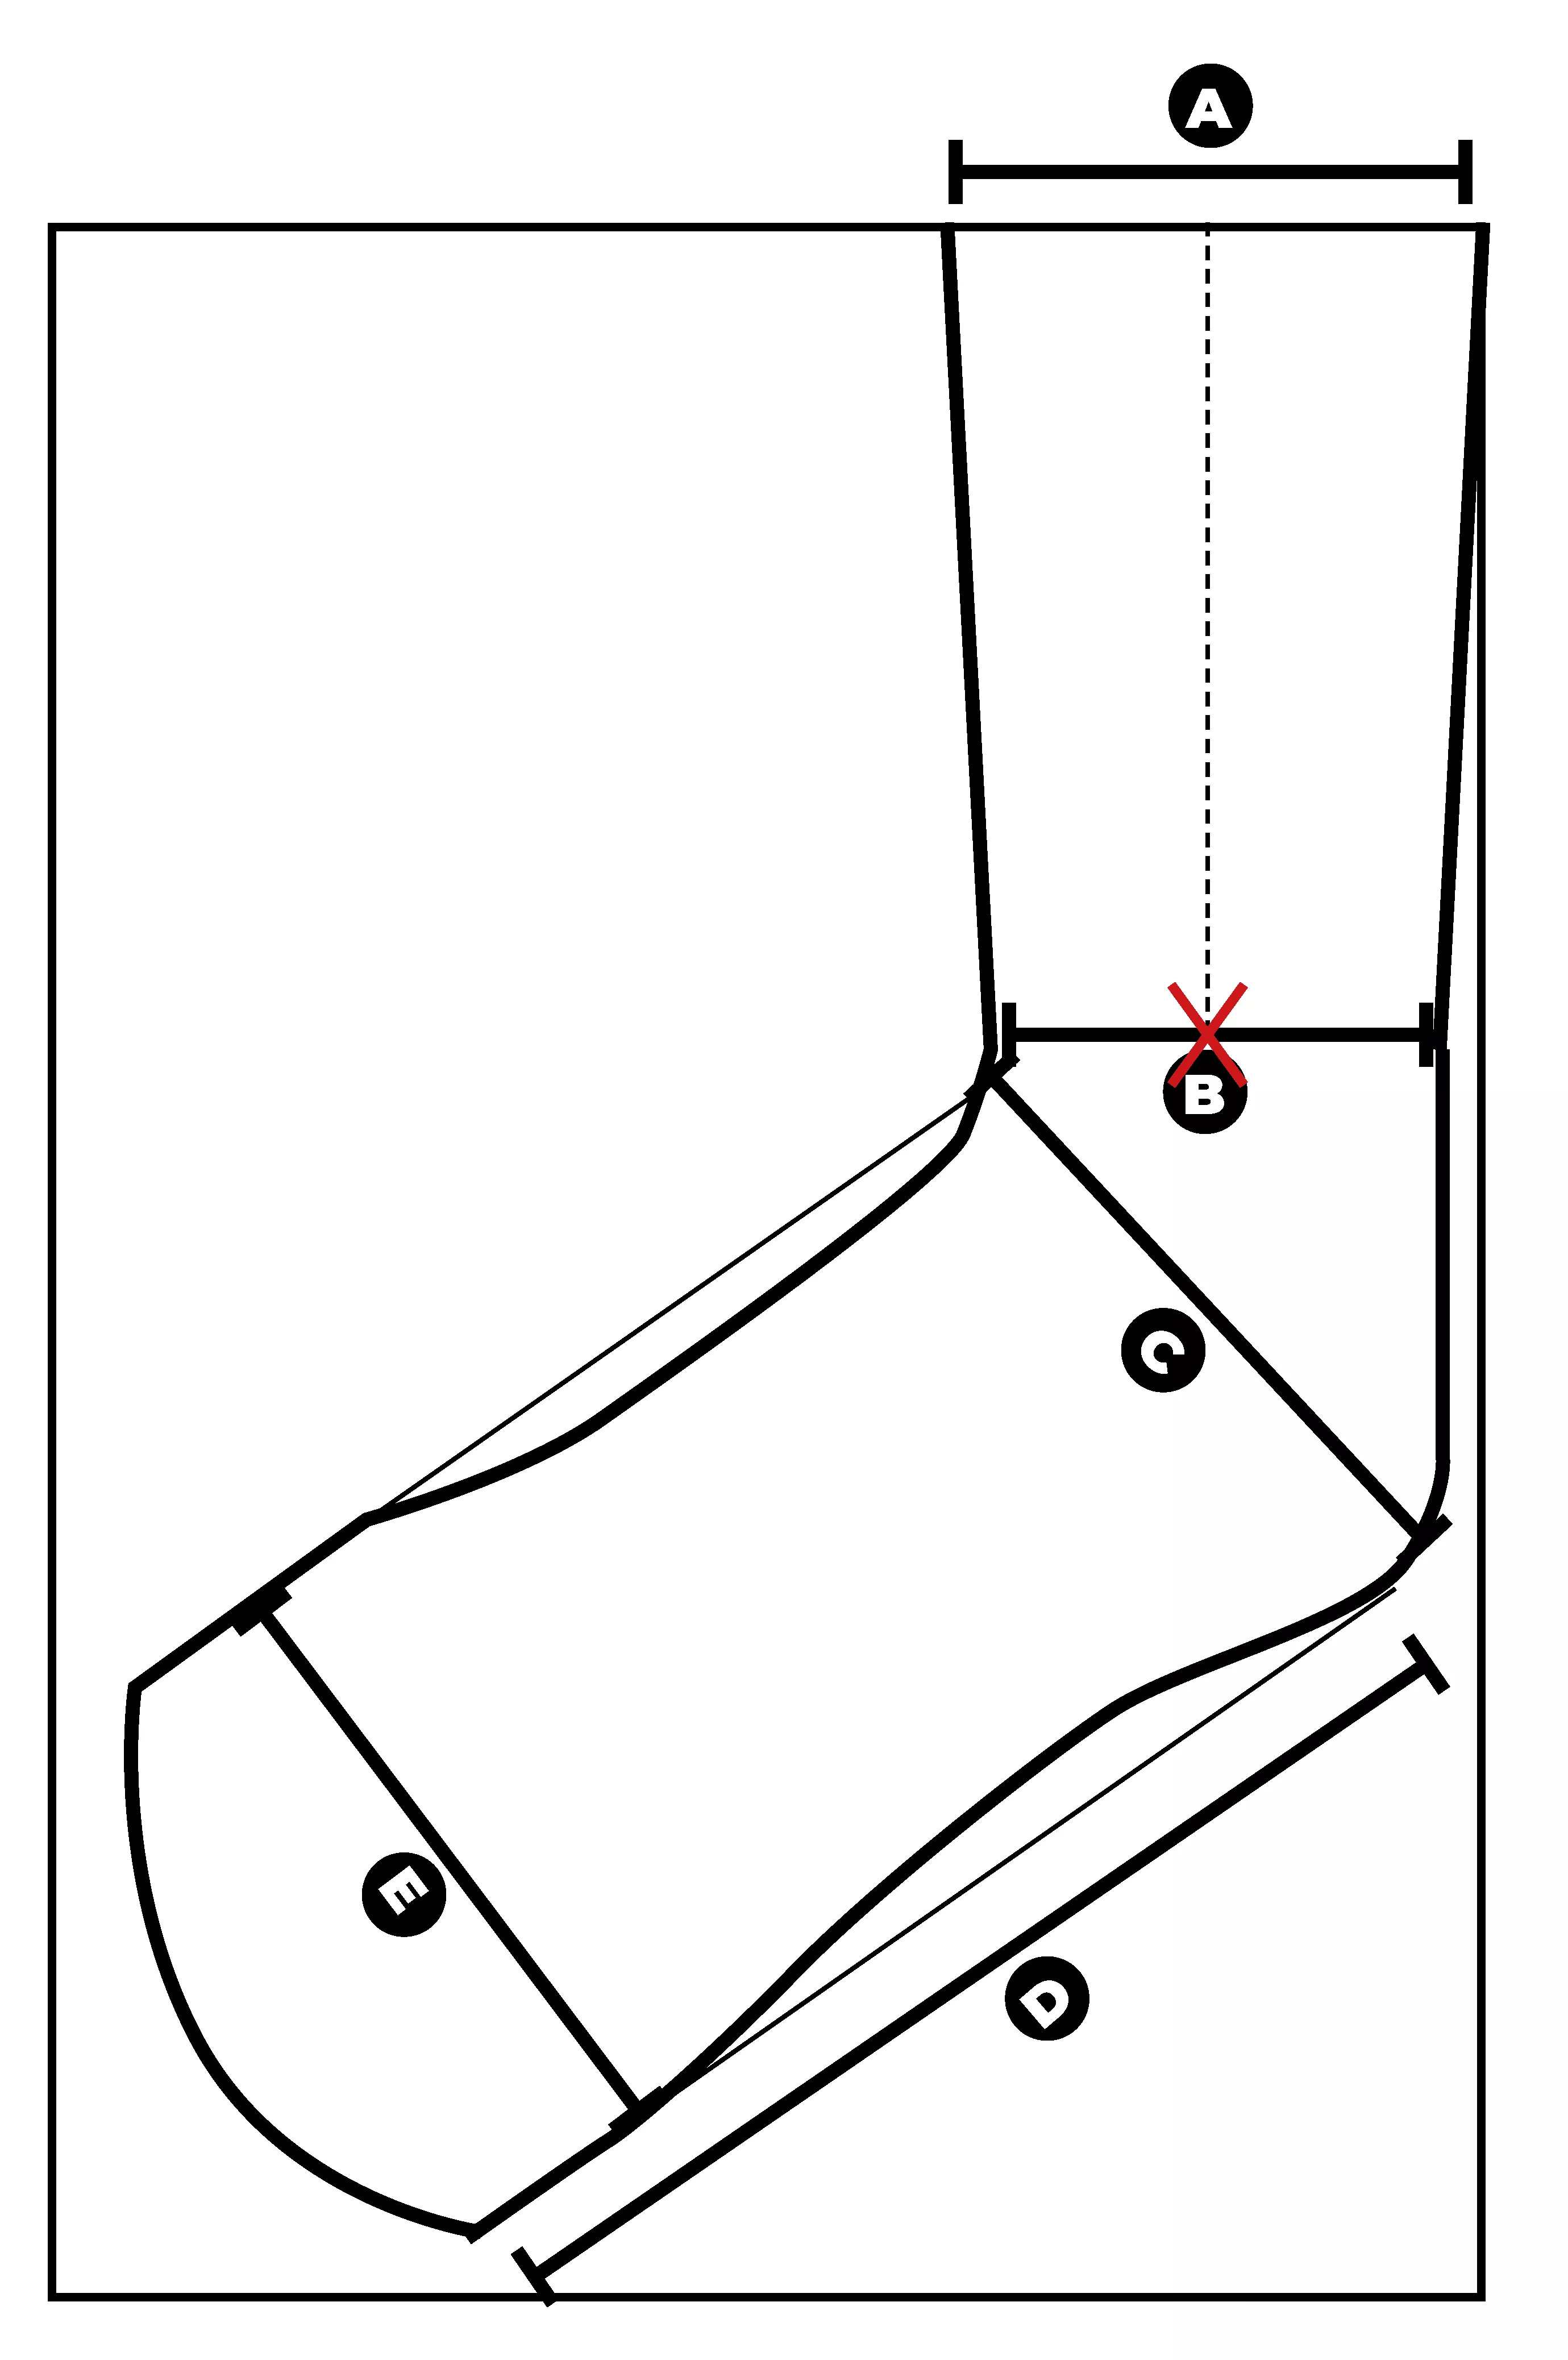
Now, we will draw the shape of the sock blocker on the paper.
- Start with the calf part. Divide measurement A by 3.14, then subtract 1 cm/0.4 inches. Example: (37/3.14)-1 = 10.8 cm.
- Transfer the result to the upper right side of the paper.
- Draw a cross 20 cm/7.9 inches below the midpoint of line A.
- Divide measurement B by 3.14. Example: 21/3.14 = 6.7 cm.
- Transfer the result by drawing a line with its midpoint at the cross.
- Connect the ends of lines A and B.
- Draw a straight line for the heel.
- Divide measurement C by 3.14. Example: 30/3.14 = 9.5 cm.
- Transfer the result by drawing a line from the bottom of the front of the calf to the bottom of the heel.
- Draw a slightly inclined line of a length equivalent to measurement D starting from the bottom of the heel.
- Draw a line parallel to it at a distance equivalent to measurement E.
- Close the feet with a perpendicular line.
- Add some curves for the toes, the sole, the heel, and the ankle.
Instructions For Shaping
- Fold the hanger in half and smooth its shape.
- Straighten the ends.
- Place the hanger above the drawing and shape it according to the drawn lines.
- Connect the ends with a piece of reinforced adhesive.
- Repeat steps 15 to 18 for the second foot.
- You can create a hook with a paperclip or a piece of wire and place it at the top of the blockers, allowing you to hang them on a radiator, for example.
Now, you have sock blockers ready to be used!
Don't forget to tag me on Instagram, Facebook, or TikTok with the hashtags #terrifiknits and #bloqueurdechaussettes or #sockblockers once you've finished, or add this project to your Ravelry list! I look forward to seeing your version!
What You'll Need:
- Iron hanger (similar to those used by dry cleaners) or strong wire
- Wire pliers
- Measuring tape
- A3-sized paper sheet
- Pencil
- Reinforced adhesive tape


There is no comment yet.
Add a comment