The Inspiration
You probably noticed — the little neck scarf has made a big comeback this season!
Of course, this kind of project immediately caught my attention!
First, because I love these small projects that let you use up leftover yarns cluttering our cupboards.
And also because it’s so hard to find good in-between-season knitting projects...
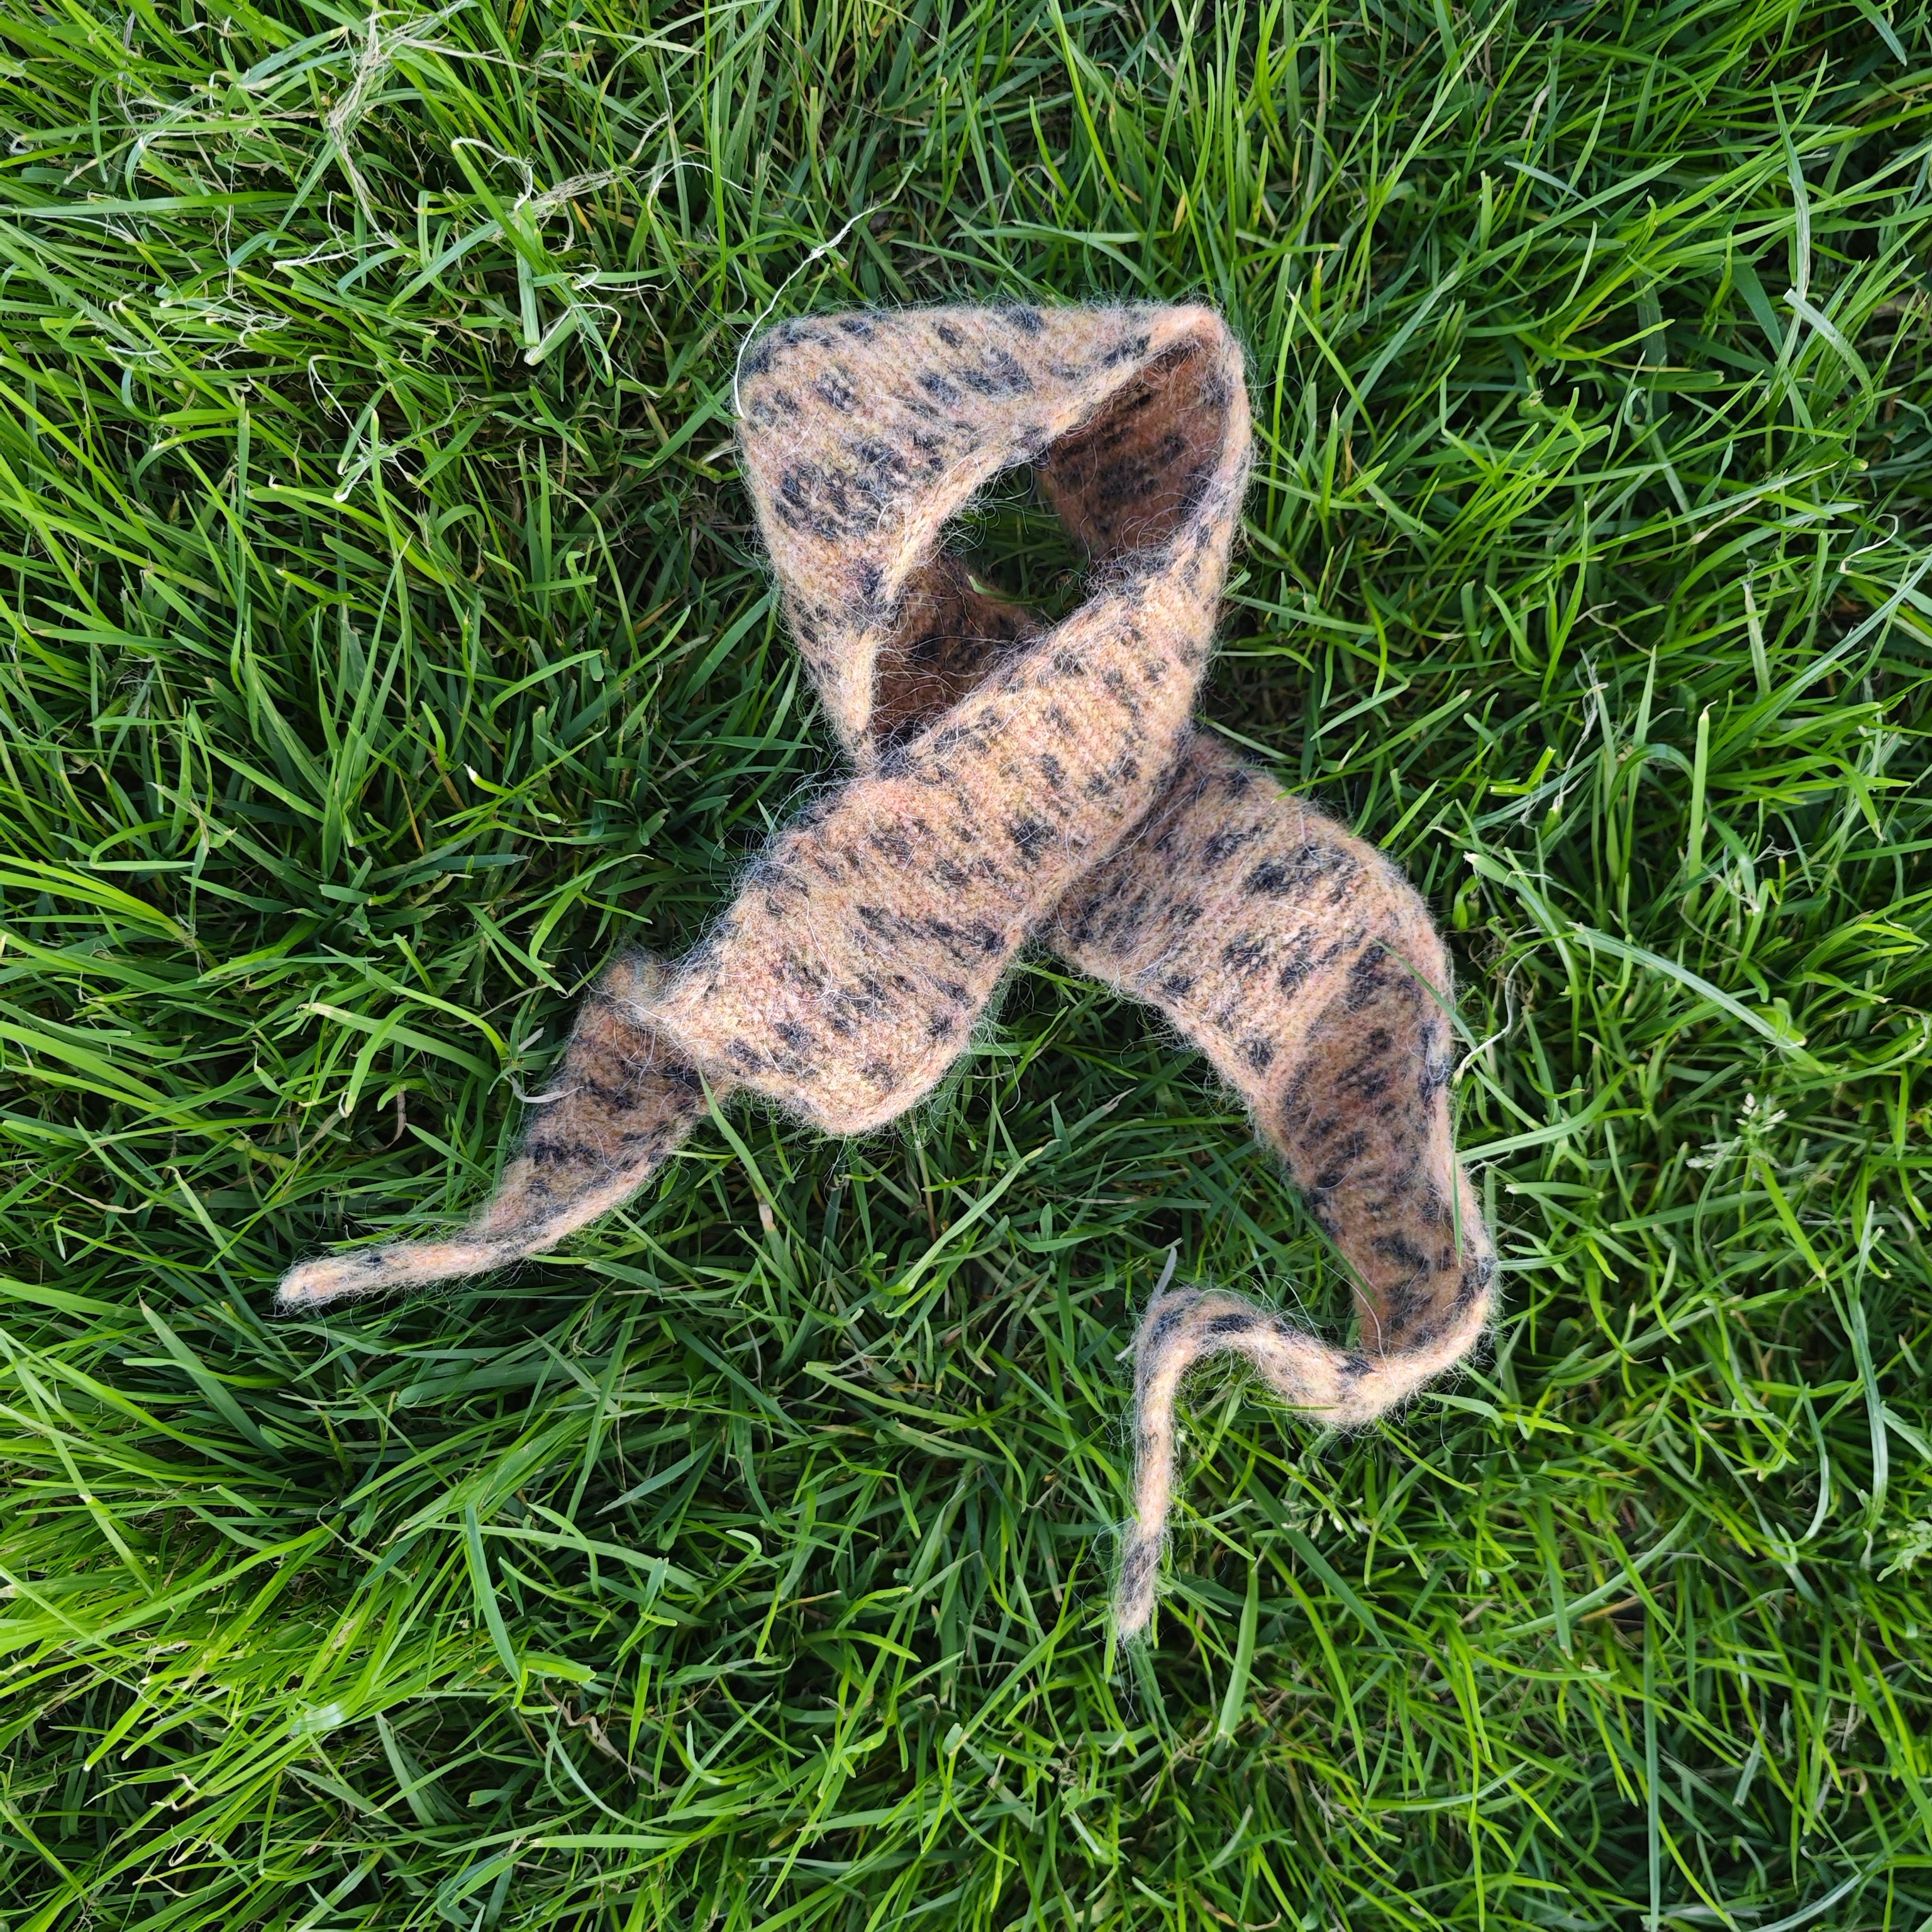
The decision was made — I was going to create my own version of this scarf! But not just any version — a stylish one, with a leopard-print look!
The Tiger Scarf was born!
The Pattern
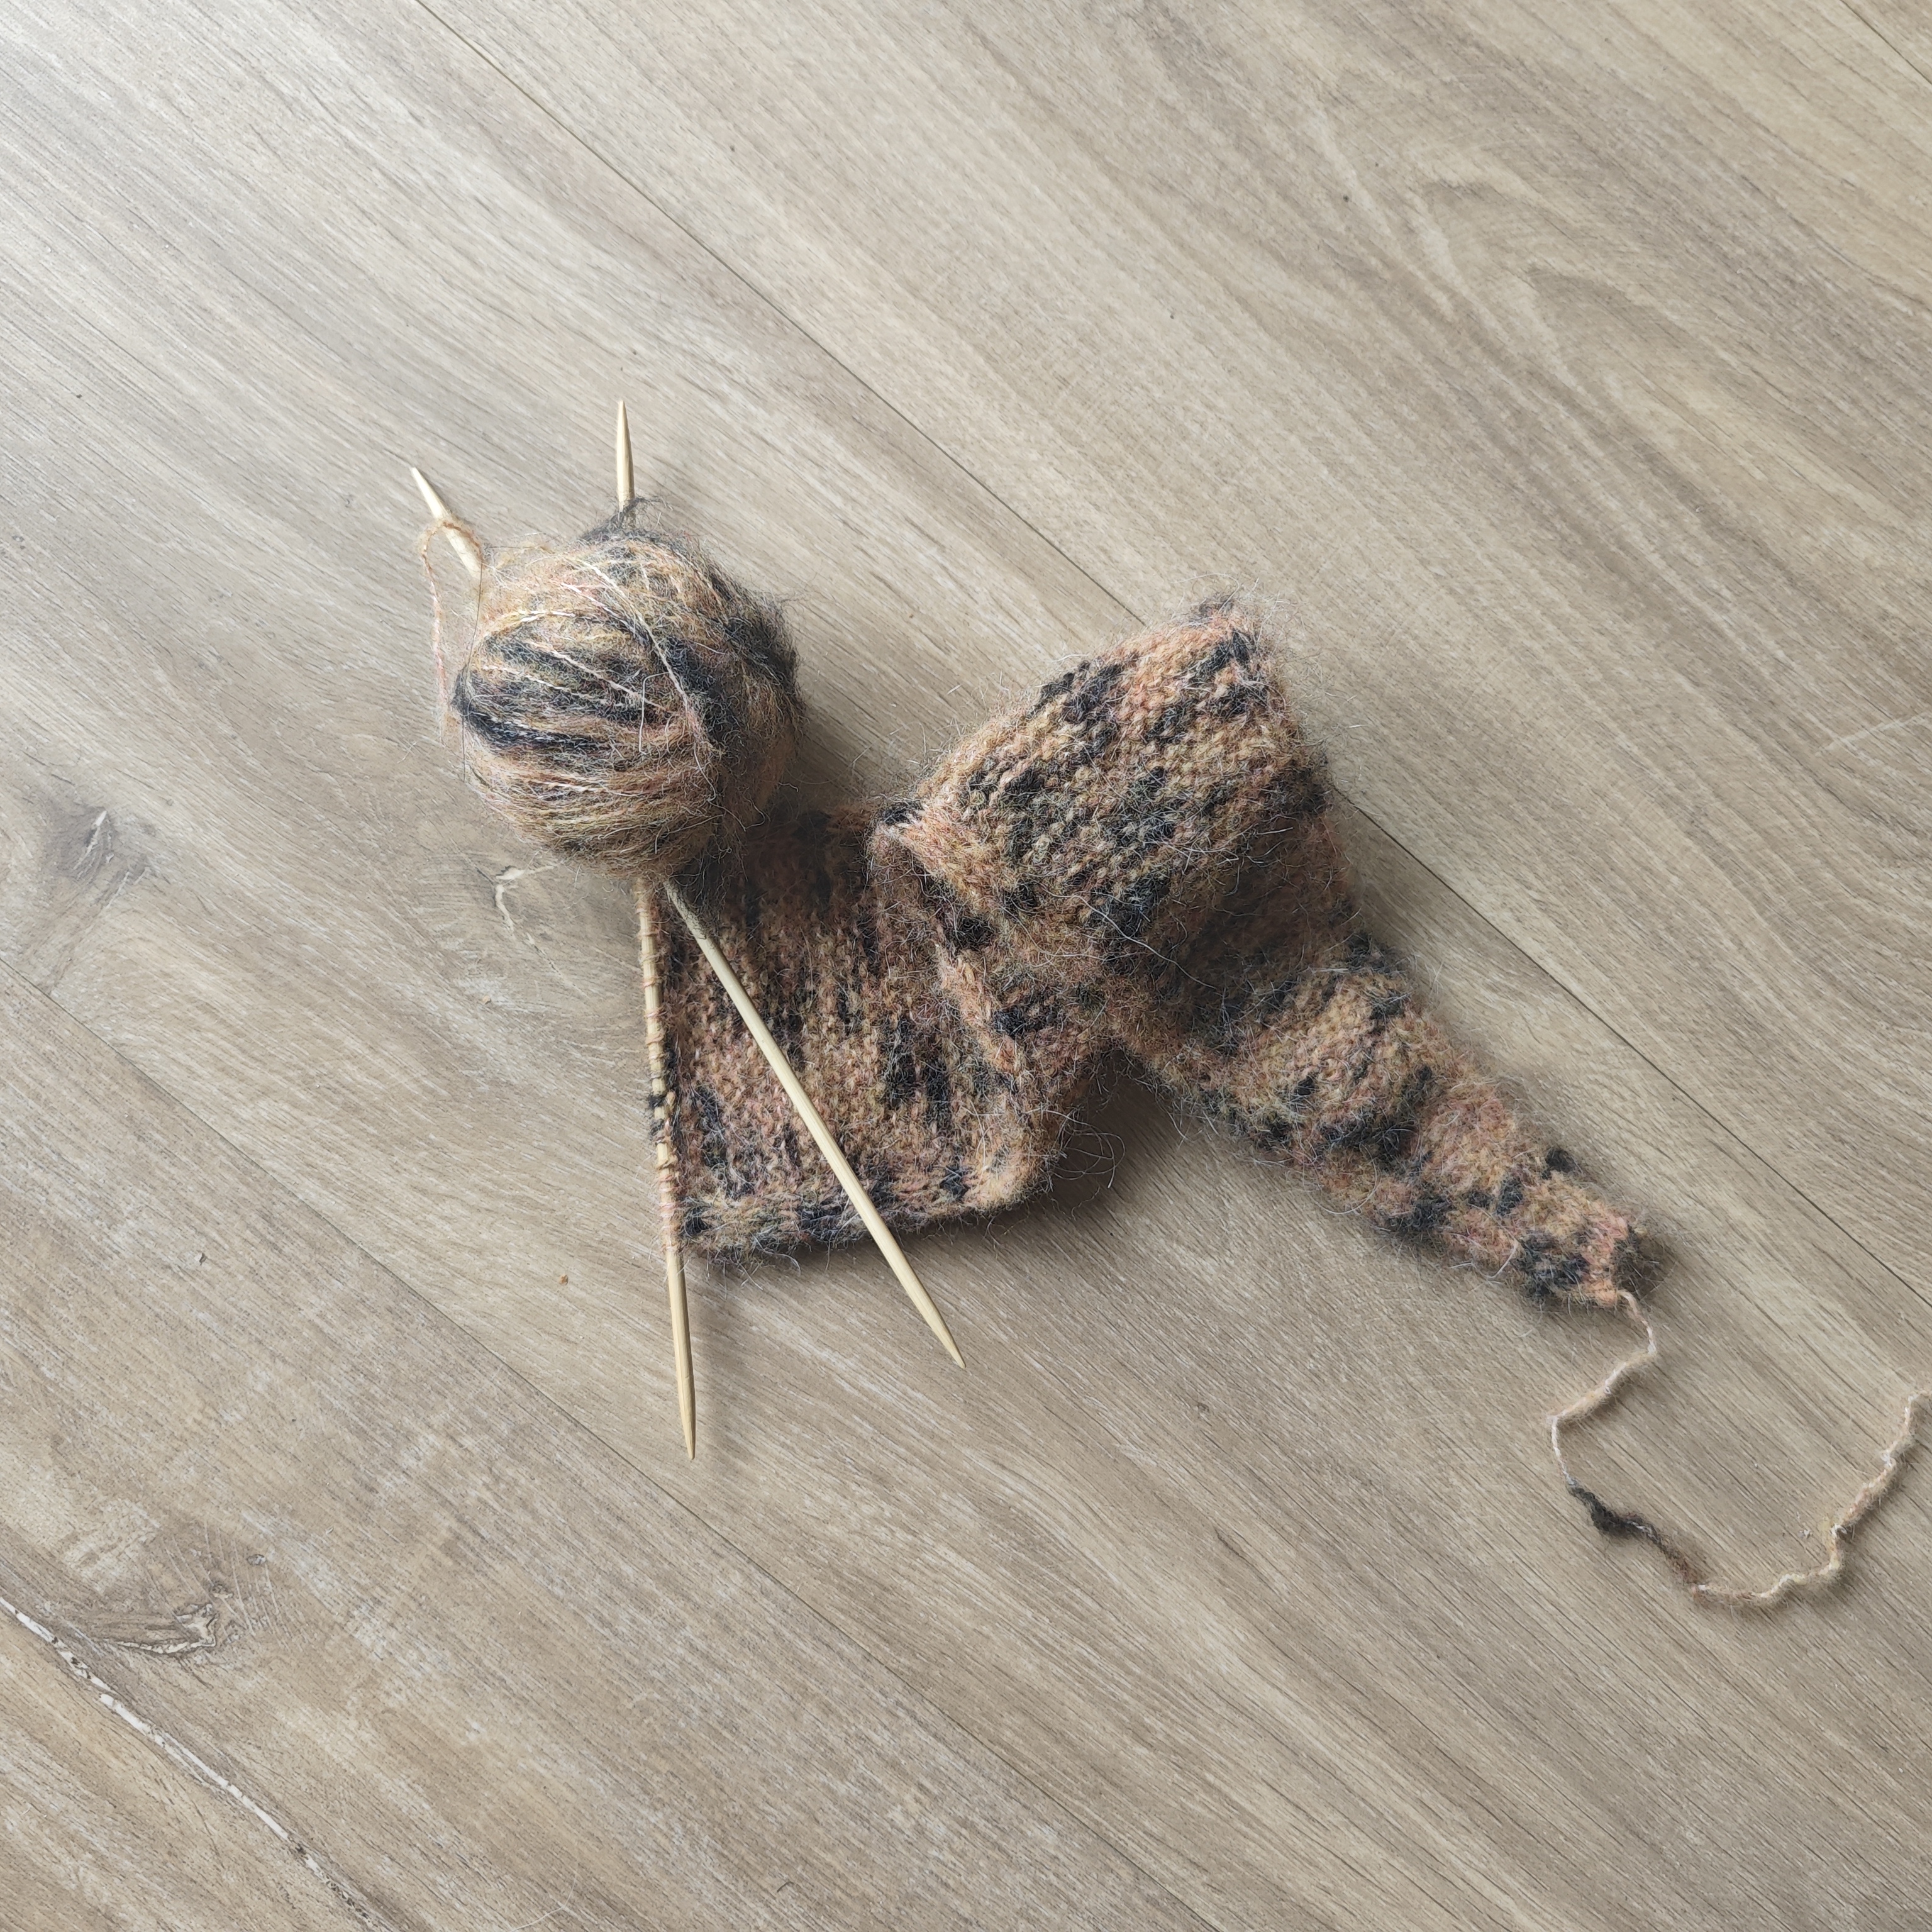
The model is worked in moss stitch bottom to top, with an integrated icord edge.
Material: 120m/117 yards of mohair, fingering quality. For substitution, I recommend choosing a main yarn with a fluffy touch, such as brushed alpaca or angora.
Needles: Double-pointed needles 3.5mm/US4 or equivalent to achieve gauge.
Gauge (10x10 cm or 4x4 in): 28 stitches × 52 rows in moss stitch.
Finished dimensions: 102cm/40in in height and 8cm/3.1in in width.

The Instructions
THE INSTRUCTIONS :
Don't forget that if you encounter any difficulties, the pattern is available as a video tutorial on my YouTube channel, Terrifiknits!
MOSS STITCH: knit on right side AND wrong side rows.
- Cast on 5 stitches with the 3.5mm/US4 needles.
- Row 1 (right side):
- Knit 2 st in the first stitch
- Knit 2 st in the second stitch
- Knit 1 st (moss stitch)
- Knit 2 st in the third stitch
- Knit 2 st in the fourth stitch
- Row 2 (wrong side):
- Slip 1 st
- Knit 1 st
- Slip 1 st
- Knit 1 st
- Knit 1 st (moss stitch)
- Knit 1 st
- Slip 1 st
- Knit 1 st
- Slip 1 st
- Row 3 (right side):
- Knit 1 st
- Slip 1 st
- Knit 1 st
- Slip 1 st
- Knit 1 st (moss stitch)
- Slip 1 st
- Knit 1 st
- Slip 1 st
- Knit 1 st
- Row 4 (wrong side):
- Slip 1 st
- Knit 1 st
- Slip 1 st
- Knit 1 st
- Knit 1 st (moss stitch)
- Knit 1 st
- Slip 1 st
- Knit 1 st
- Slip 1 st
- *Row 5 (right side), increase one stitch (10 st):
- Knit 1 st
- Slip 1 st
- Knit 1 st
- Slip 1 st
- Knit 1 st (moss stitch)
- Pick up the yarn between the stitch you just knitted and the next one, from front to back and knit it on the back loop
- Slip 1 st
- Knit 1 st
- Slip 1 st
- Knit 1 st
- Row 6 (wrong side):
- Slip 1 st
- Knit 1 st
- Slip 1 st
- Knit 1 st
- Knit 2 st (moss stitch)
- Knit 1 st
- Slip 1 st
- Knit 1 st
- Slip 1 st
- Row 7 (right side):
- Knit 1 st
- Slip 1 st
- Knit 1 st
- Slip 1 st
- Knit 2 st (moss stitch)
- Slip 1 st
- Knit 1 st
- Slip 1 st
- Knit 1 st
- Row 8 (wrong side):
- Slip 1 st
- Knit 1 st
- Slip 1 st
- Knit 1 st
- Knit 2 st (moss stitch)
- Knit 1 st
- Slip 1 st
- Knit 1 st
- Slip 1 st *
- Repeat from * to * 17 times to increase one stitch on the left side every 4 rows. We have: 4 st for the edge, 18 st for the main part, 4 st for the edge.
- Keep knitting like this (4 stitches for the edge, 18 stitches moss stitch and 4 stitches for the other edge) until the work is 90 cm or 35.5 in height.
- Start decreasing by knitting together the last 2 moss stitches once every 4 rows.
- Reproduce those decreases 17 times every 4 rows in total: 9 stitches after 68 rows
- Knit together stitches 1 and 2, then stitches 3 and 4, knit stitch 5 alone, knit together stitches 6 and 7, then stitches 8 and 9.
- Bind off.
- Weave in the ends and block.
And there you have it, your Tiger scarf is finished! Now, all that's left is to test it out in real-life situations!
Don’t forget to tag me on Instagram, Facebook or Tiktok #terrifiknits and #tigerscarf or #echarpeTiger once you're done or add this project to your Ravelry list ! Can't wait to discover your version

What You'll Need:
Knitting pattern : click on the button bellow to download the pdf pattern
Tiger Scarf Terrifiknits (PDF, 511.87 KB)
All my patterns are available for free.
So dont forget to show your support by subscribing to any of my social medias !
You'll help increase the visibility of my work...
You're document will be available in
Your file is availableDownload
Yarn used: Phil Leo, color fauve, Phildar
https://www.happywool.com/p/phil-leo-p-070011.html#skuId:234136


There is no comment yet.
Add a comment