The Inspiration
The headband is a must-have for a chic wardrobe.
It made a major comeback in our closets a few years ago, thanks to its numerous advantages. Indeed, it keeps the head warm (or at least a part of it) while adding a touch of elegance and avoiding the disruption of hairstyles, especially bangs or buns, as a hat might do, for example.
From a technical standpoint, it's a very easy and accessible knitting project, especially for beginners. It also serves as a great introduction to circular knitting before taking on more substantial projects like a sweater.
Knitting a headband, in conclusion, ensures a quick and yarn-friendly project, perfect for using up those lonely skeins in your stash!
The Twist & Tight Headband
I designed this headband based on two principles that are my usual creative drivers: elegance and personalization.
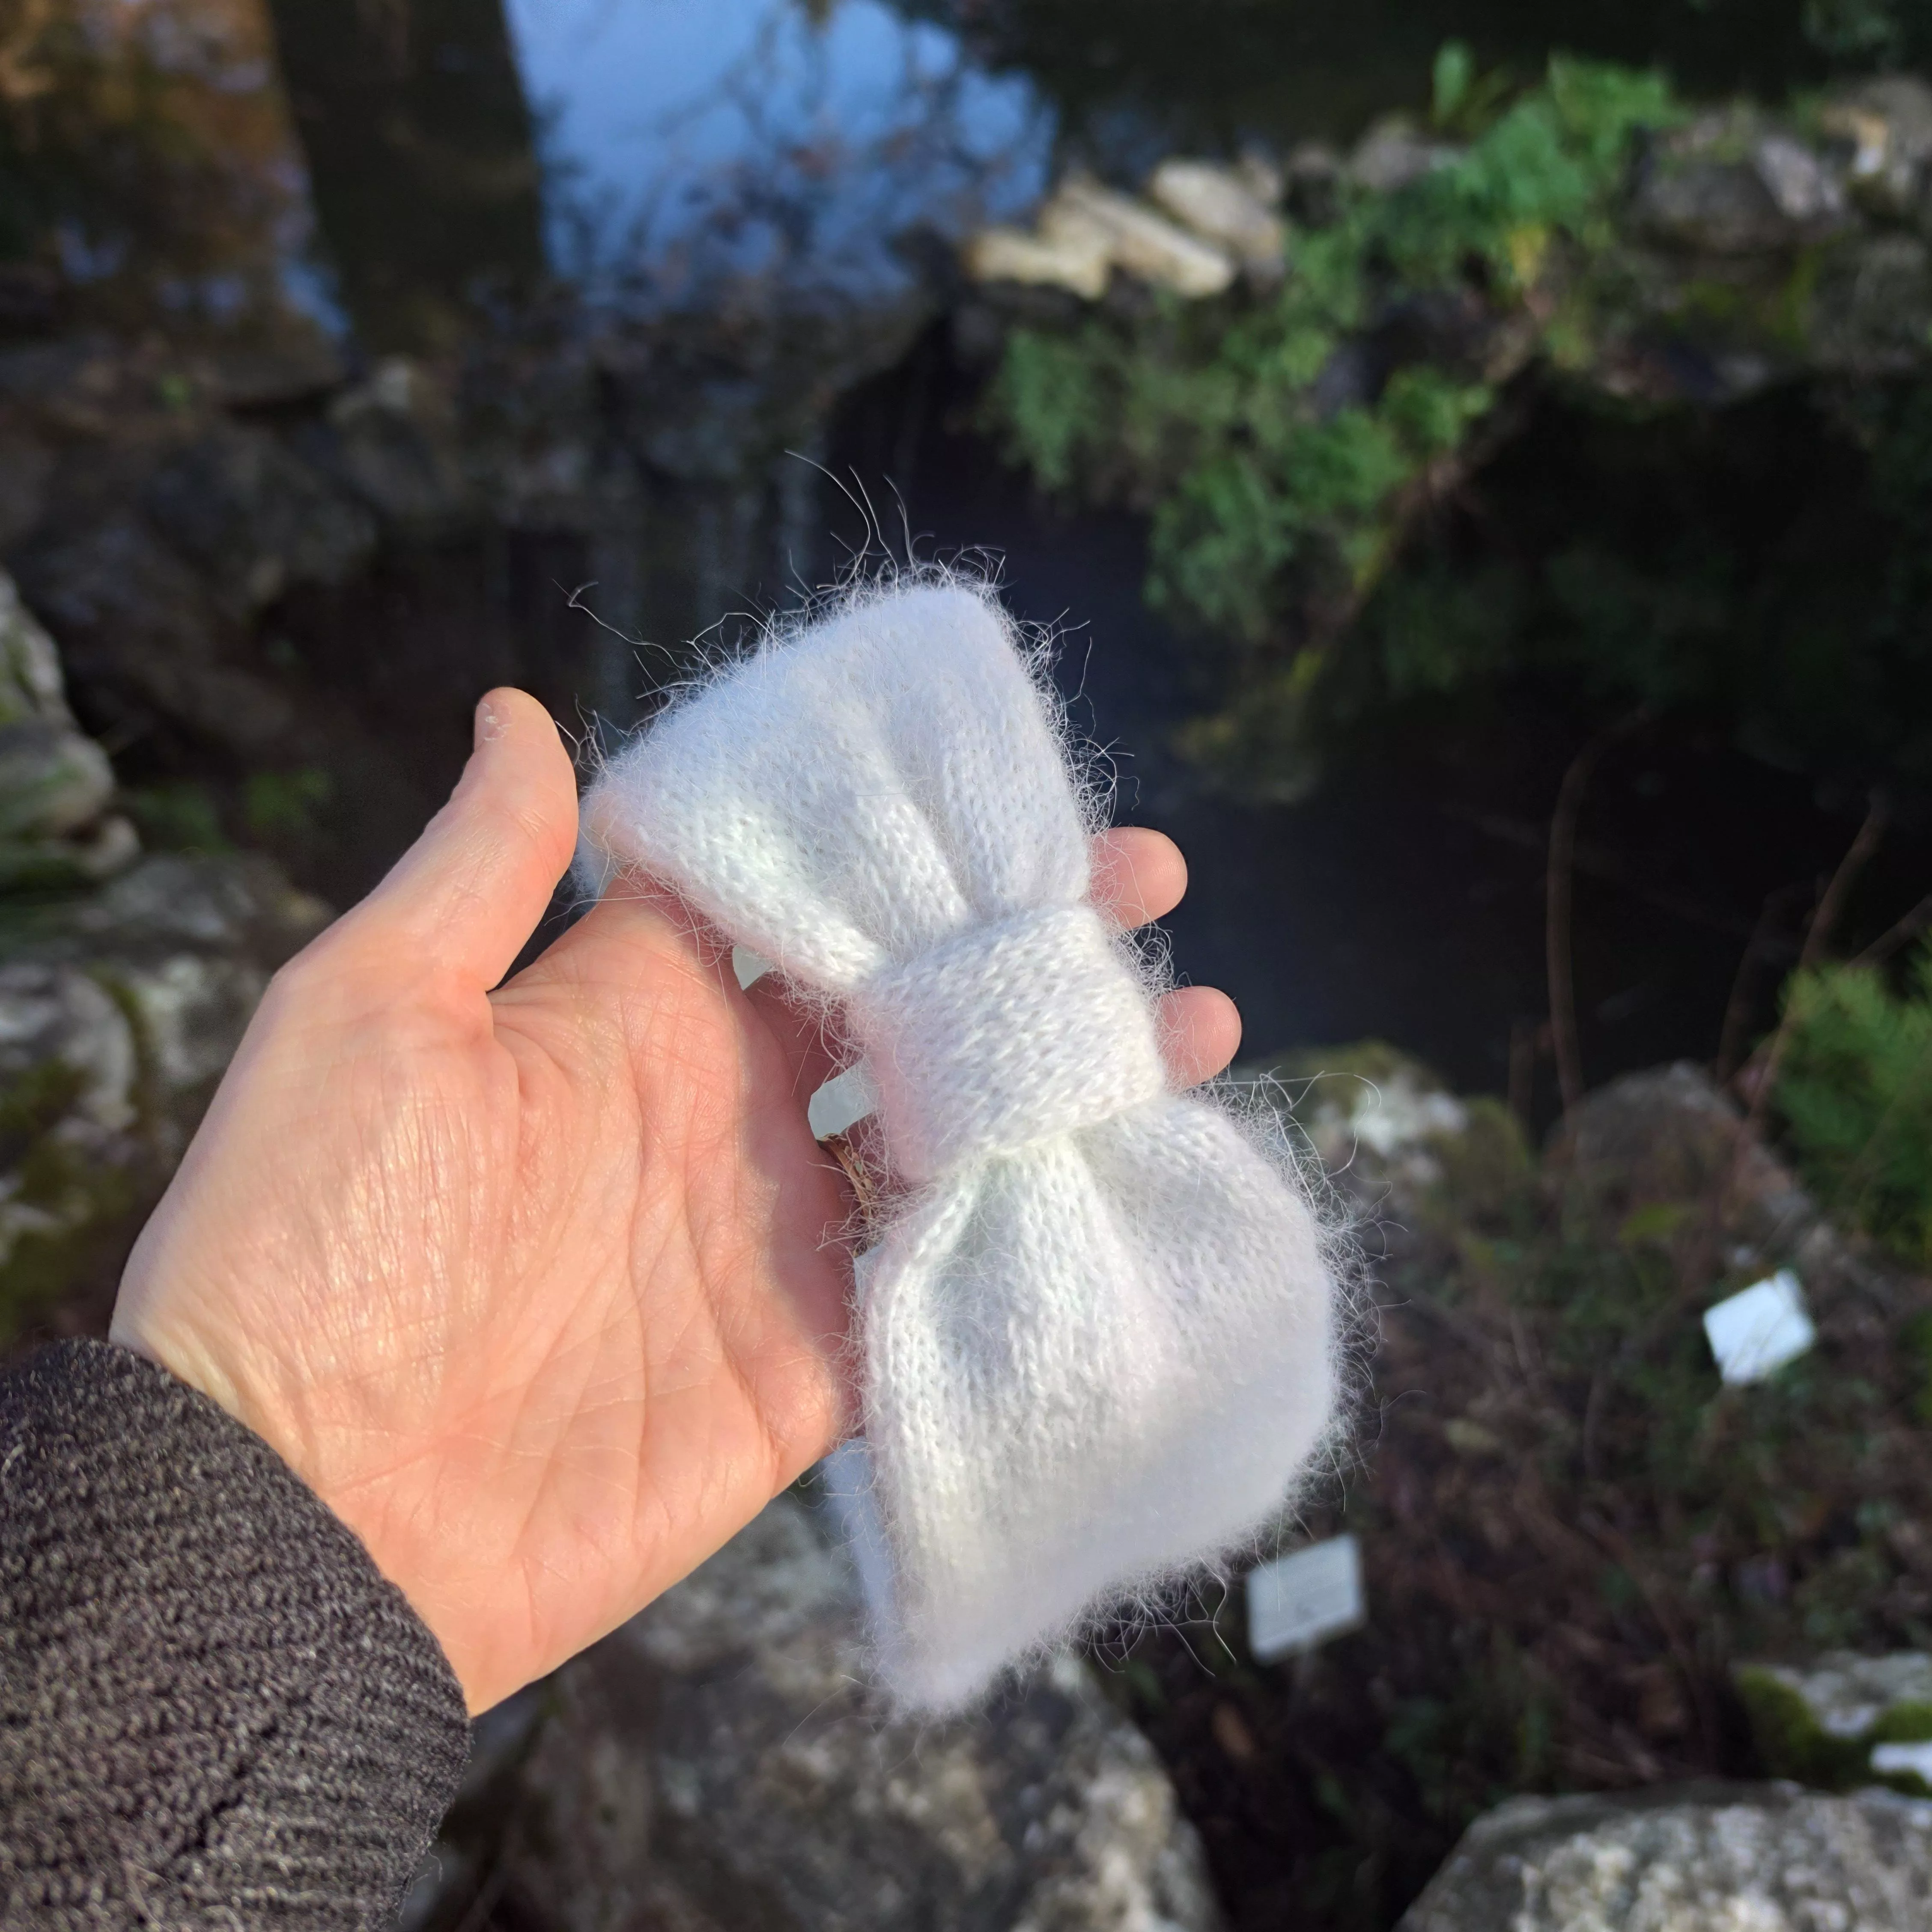
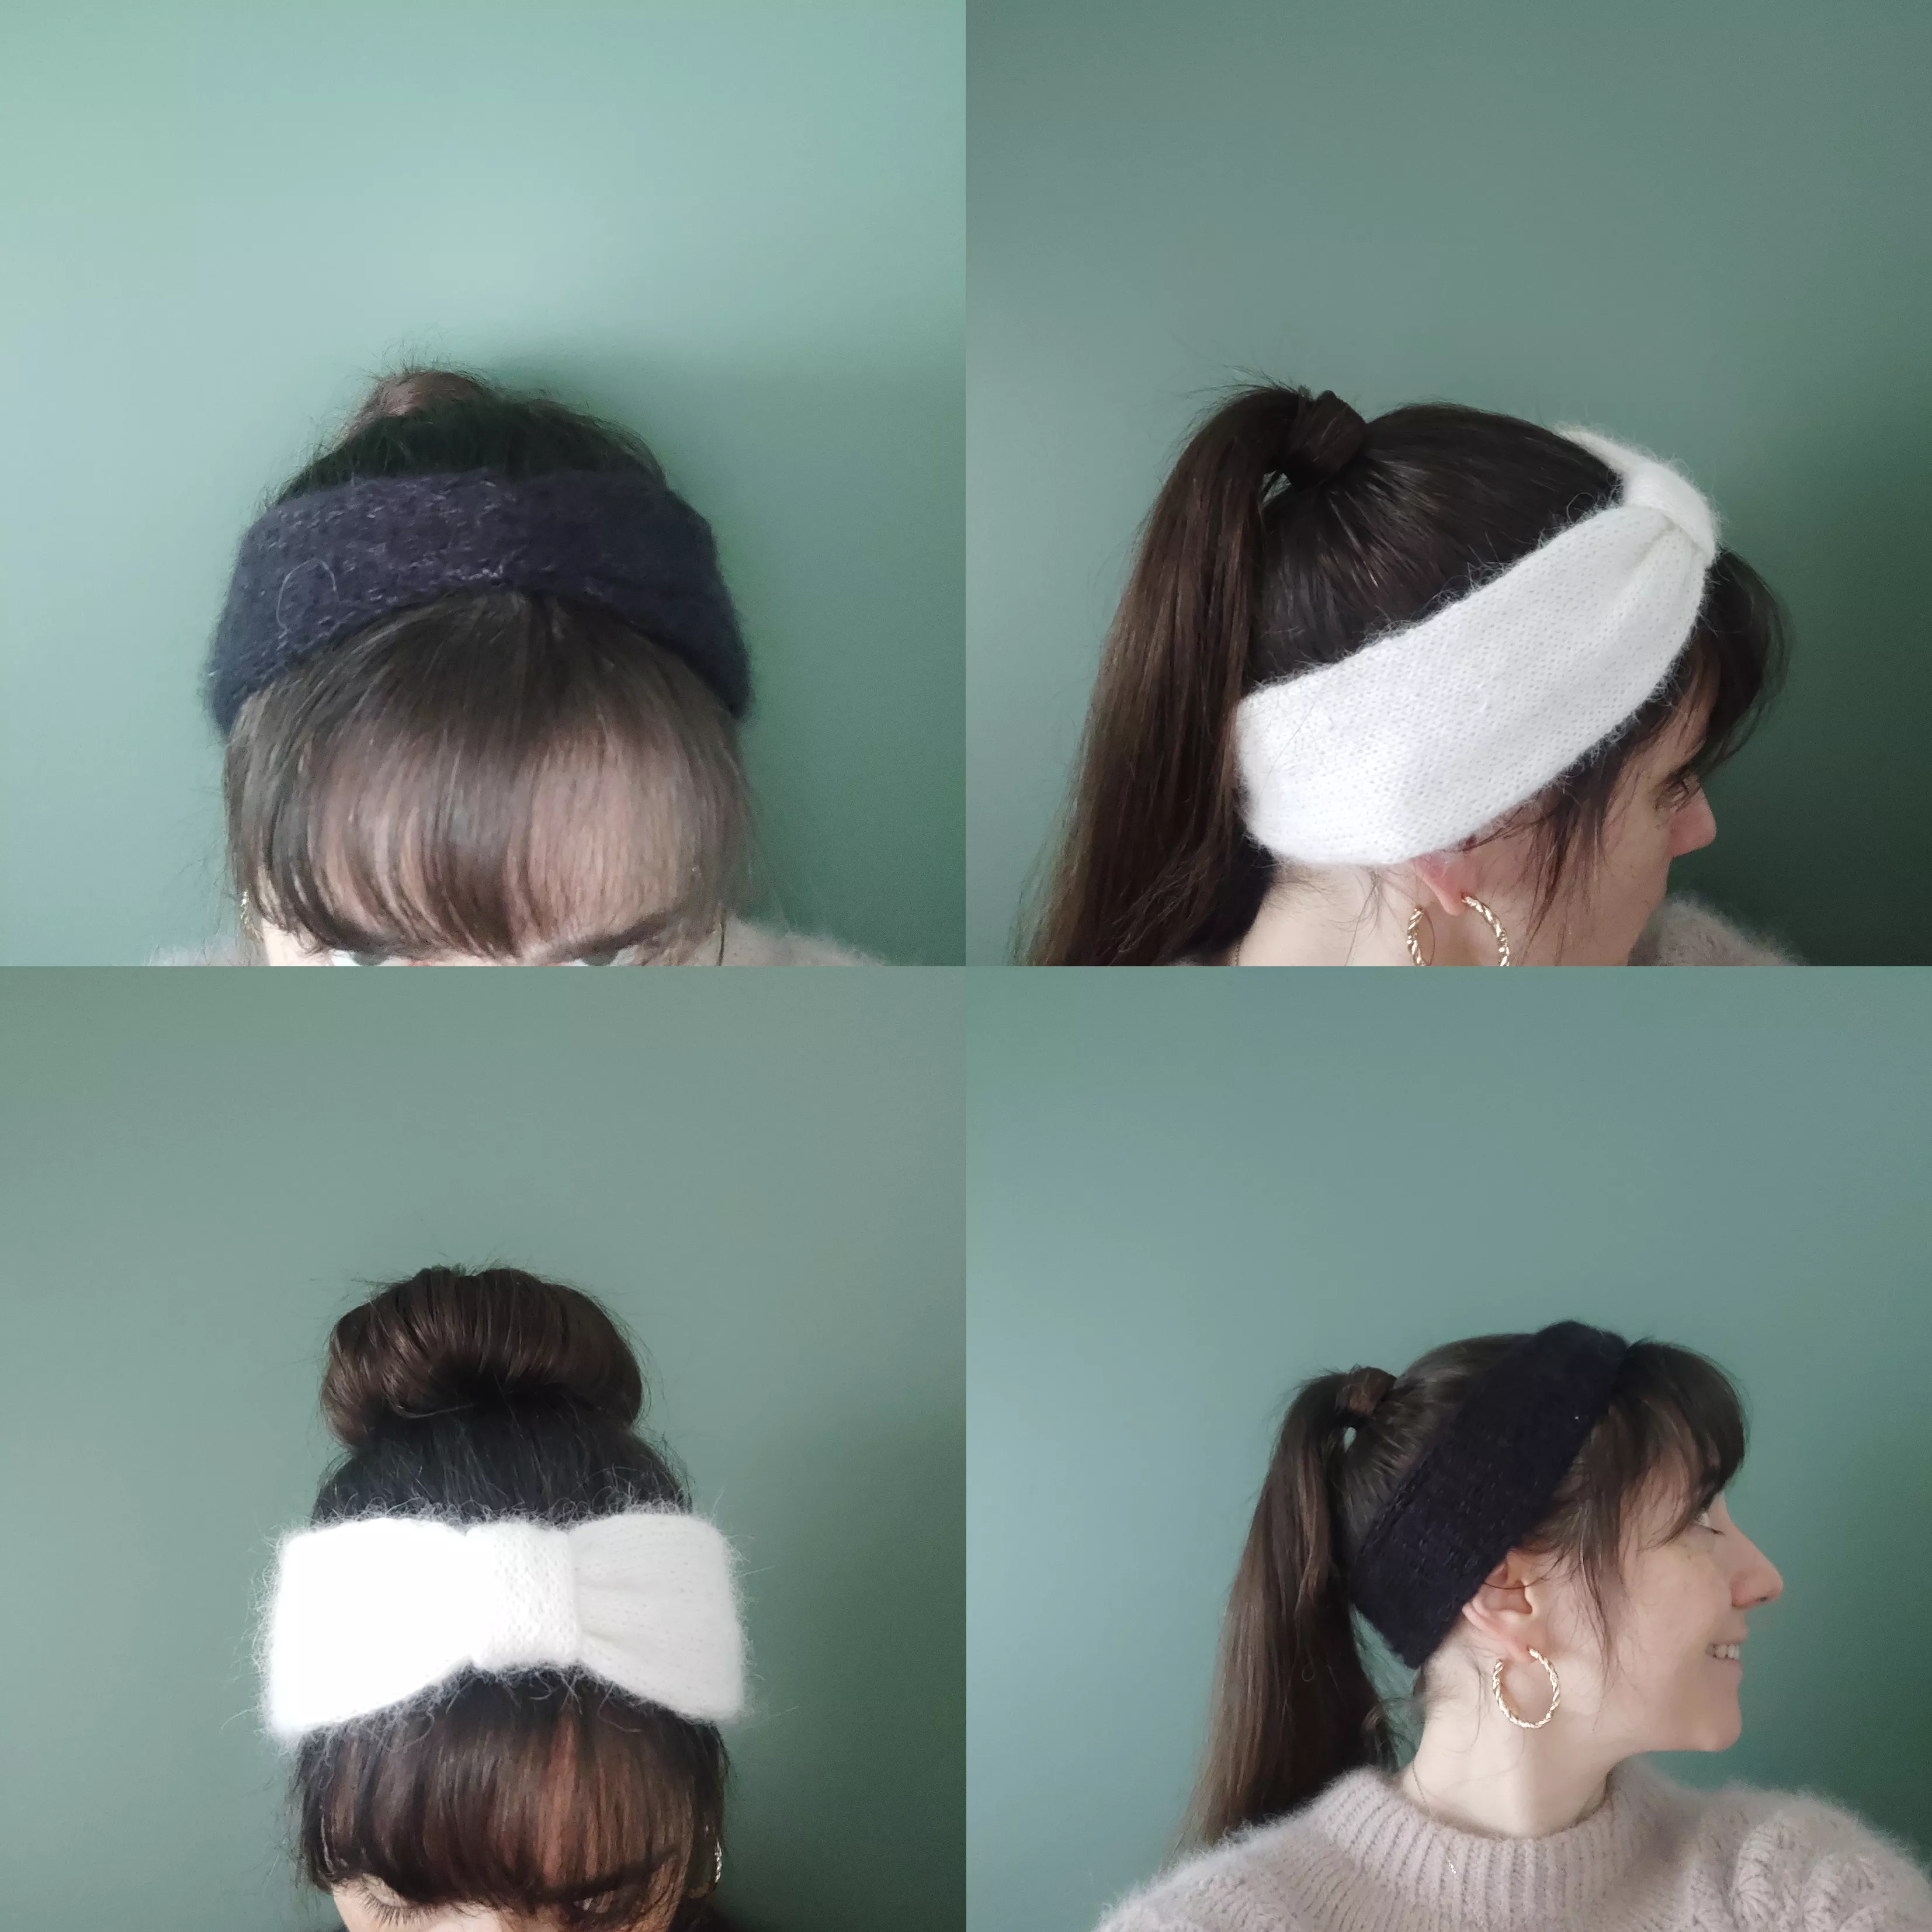
For the elegance aspect, I envisioned this model to be crafted with luxurious materials. In the photos, the white model, for example, is made with angora, while the second one is in mohair. Feel free to use a more rustic yarn for a casual look.
The simplicity of the form is enhanced by a touch of sophistication through the two closure options offered: an "infinity" stitch for a knot effect or a tightening band for a pleated look.
For personalization, I wanted to offer you a model easy to adapt to your preferences. As mentioned above, I've planned two different finishes for the headband closure, allowing you to choose the style that suits you. You can even mix both options, having an invisible infinity stitch hidden by a tightening band.
In the photo, the black model is crafted with double strands of mohair and 4mm/US6 needles, resulting in a final width of 10cm/4in. The white model, knitted with single-strand angora yarn on 3.5mm/US4 needles, has a width of 7.5cm/3in. This flexibility enables you to create a headband of your desired width; simply adjust the needle size. To ensure a perfect fit, I recommend creating a 10cm/4in sample to avoid surprises in the final product.
To guide you through your project, I've created a YouTube tutorial, perfect for beginners and beyond:
The Pattern
The pattern is worked in circular jersey stitch and sealed with a seam, offering two finishing options.
Material: 100m/109.4 yards of Fine quality yarn. I used angora for the white model and two strands of mohair for the featured black model.
Needles: Double-pointed needles of size 3.5mm/US4 or equivalent to achieve the correct gauge.
Gauge 10X10 cm / 4x4in: 21 stitches X 26 rows.
Finished Sizes: 7.5cm/3in wide by 40cm/15.7in high.
The Instructions
Don't forget, if you encounter any difficulties, the tutorial video for this pattern is available on my YouTube channel, Terrifiknits!
- Cast on 40 stitches onto one needle, then distribute them evenly onto 3 needles.
- Place the stitches in a circular manner and start knitting in the rounds, making sure that the stitches do not twist.
- Move the stitches from one needle to another at each round to avoid creating holes between the stitches.
- Place a marker above the stitch where the rounds join. The rounds start from here. Also, place a fixed marker in the middle of the round (20st)..
- Continue knitting in this manner, moving the marker along with each round.
- Knit until the work is about 3cm/1.2in less long than the size of your head. Place a marker in the middle of the last round (20st).
- Bind off by knitting one stitch, then another, and passing the first stitch over the second.
- Cut the yarn, leaving enough length to sew (approximately 4 times the width).
- Insert the loose end through the last stitch and pull.
- We have a band with two evenly placed markers on each end.
- Option 1 : The headband tightened by a small strip
- Cast on 20 stitches in the round using the same method as for the band.
- Knit in the round for about 7 cm/2.8in.
- Bind off using the same method as before.
- Push the loose end inside the band.
- Cut off the yarn leaving about 10cm/3.9in of loose end.
- Sew the two ends together by pulling a thread under each facing stitch.
- Weave in the ends.
- Insert the wide band into the small ring.
- Sew the ends of the wide band as seen previously, making sure there is no twist and that the markers coincide.
- Once the seam is complete, weave in the yarn ends and remove the markers.
- Option 2 : The headband twisted
- Fold the ends of the headband, directing the openings, one upwards, the other downwards.
- Now, we will join the facing ends together, making sure to sew each layer separately.
- To make this seam, pull a thread under each facing stitch. Pull the thread tight to make the seam invisible.
- Continue in this manner all along, ensuring to keep the openings opposite each other.
- Once the seam is complete, weave in the yarn ends and remove the markers.
And there you have it, you've completed your Headband Twist & Tight! Now, it's time to test it out in real-life settings!
Don't forget to tag me on Instagram, Facebook, or TikTok using the hashtags #terrifiknits and #headbandtwistandtight or #twistandtightheadband once you've finished, or add this project to your Ravelry list! I can't wait to see your version!
What you'll need :
Knitting pattern: Instructions downloadable by clicking on the button bellow
Twist and tight Headband Terrifiknits (PDF, 451.86 KB)
All my patterns are available for free.
So dont forget to show your support by subscribing to any of my social medias !
You'll help increase the visibility of my work...
You're document will be available in
Your file is availableDownload
Yarn used : Phil Pur Angora from Phildar/Happywool
https://www.happywool.com/p/phil-pur-angora-p-25935.html#skuId:121979
or Kidsilk by Drops
https://www.garnstudio.com/yarn.php?show=drops-kid-silk&cid=8


There is no comment yet.
Add a comment