What Is Ribbing?
Ribbing is one of the most basic stitches in knitting.
When you start knitting, you learn to knit and purl. Then, most often, the first "fancy" stitch you learn is ribbing.
Indeed, consisting of an alternation of knit and purl stitches, it is an extremely easy stitch to technically achieve. It only requires basic knowledge and adds texture to the monotony of plain stockinette stitch.
Ribbing is used in many patterns, from the simplest to the most complex, because it has several very interesting characteristics.
Firstly, it adds elasticity to the fabric. The alternation of knit and purl stitches allows the fabric to contract horizontally on itself. To be more specific, when you knit 10 stitches in ribbing, you get a narrower sample than if you knit 10 stitches in stockinette stitch. However, when you stretch the fabric, you notice that you recover the same width or sometimes even more depending on the ribbing method used. Thus, when ribbing is used on the hem, collar, or armholes, it ensures a very good return of the shape to its initial dimensions as well as a convenient elasticity for putting on the garment while achieving a close-fitting final result.
Secondly, ribbing has the advantage of creating horizontal shaping of the fabric. This particularity is especially useful for adding structure to the work. Indeed, plain stockinette stitch knitting can tend to make textiles flexible, which may deform over time. However, ribbing on the hem, collar, or armholes provides rigidity to the horizontal lines, which helps to structure the openings and achieve well-defined drape. When ribbing is used throughout the height of the work, it creates a curved effect, with a very straight close-fitting result, which can be very flattering for the silhouette.
Finally, ribbing is simply beautiful. As mentioned earlier, it creates raised stripes, adding texture to the fabric and can be useful for masking irregularities when starting with stockinette stitch and struggling to knit large surfaces flawlessly. Moreover, there are a variety of techniques for knitting ribbing, offering a wide range of achievable finishes even for beginners. For example, simply playing with the number of knit and purl stitches can give a very different look to the same work.
Different Technics To Knit Ribbings
As I mentioned earlier, there are many techniques for creating ribbing. Choosing the right technique is of major importance because it mainly determines three elements:
- Elasticity of the result: The principle of ribbing is that it provides elasticity to the fabric. However, not all ribbings have the same elasticity coefficient: some have a very high stretching capacity, while others allow for moderate stretching.
- Visual rendering: Aesthetically, not all ribbings look the same. Depending on the project and personal preferences, one may choose one method over another or even combinations of several methods.
- Yarn consumption: This aspect is closely related to the elasticity of the result. Often, the more elastic the project, the more yarn it consumes per given surface. Some methods are very yarn-intensive. This can weigh in on the decision-making process as it inevitably increases the cost of the project.
In the following paragraphs, I will specifically discuss four methods for creating ribbing:
- Classic ribbing
- Ribbing with the yarn carried on top
- Brioche stitch
- Purl ribbing
I have prepared YouTube videos to help you understand and visualize each technique. I will provide the links to these videos under each relevant paragraph. You can find all of them on my YouTube channel here:https://www.youtube.com/channel/UC_9dowLMVIA1JjHqqFB8Gkw
For each technique, I will explain how to execute it concretely, as well as its advantages and disadvantages.
At the end of the article, I will offer a summary table to facilitate comparison of all the techniques. I have created samples of the same size using each technique and will provide the normal and stretched dimensions to give you an idea of the elasticity of each method.
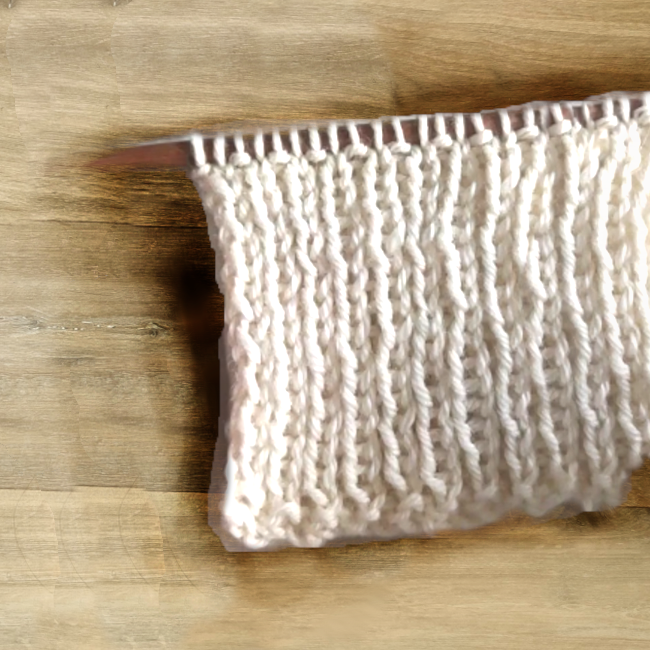
The Classic Ribbing
Link to the Youtube tutorial : https://youtu.be/XOqrIjqkCUw
This is THE basic method. Simple to memorize and execute, it is accessible to beginners and quick to reproduce for experienced knitters. It simply involves alternating between knit and purl stitches at a regular pace. Used in the majority of patterns, it provides elasticity to cuffs, hems, and collars. By adjusting the number of knit and purl stitches, one can create very aesthetic textured effects, as I did for the Wide Ribbed Sweater or the Rugby Socks.
To reproduce this method:
Row 1 (right side): *Knit 1, Purl 1*. Repeat from * to * until the end of the row.
Row 2 (wrong side): *Purl 1, Knit 1*. Repeat from * to * until the end of the row.
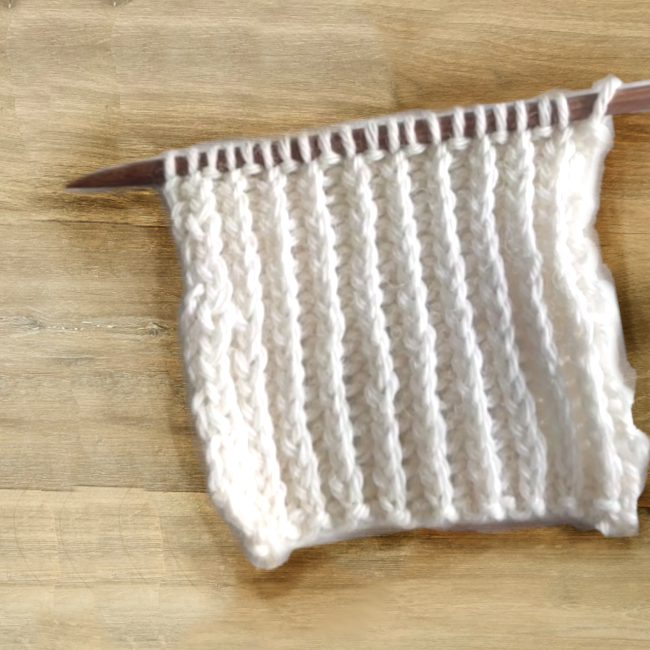
Les côtes classiques avec fil sur le dessus :
Link to the Youtube tutorial : https://youtu.be/V_tpzEHALeg
This is a method derived from the classic method. I'm not sure if it's very common or widely accepted in the community, but I use it regularly. Indeed, it involves knitting "in the wrong way." This means that instead of the yarn going around the needle as usual, it passes directly over the needle. So in the case of a knit stitch, the yarn doesn't go behind then over the left needle from right to left, but goes directly over the right needle from right to left. In my opinion, this method allows for very tight, well-defined stitches that are also smaller. The ribs are very straight and fine. In my view, this visual effect is very interesting for projects requiring more finesse, such as children's/baby clothes, socks, and fine hats, etc. However, the elasticity is slightly less important than with the classic method. I used this technique for the edges of the Tiara Sweater, for example. More generally, I knit with the yarn on top for projects where I want a very tight stitch appearance without necessarily using smaller needles, such as for the Sweet Thing Socks or the double jersey edges of the Transhumance Vest.
To reproduce this method:
Row 1 (right side): *Knit 1 with yarn over the needle, Purl 1 with yarn over the needle*. Repeat from * to * until the end of the row.
Row 2 (wrong side): *Purl 1 with yarn over the needle, Knit 1 with yarn over the needle*. Repeat from * to * until the end of the row.
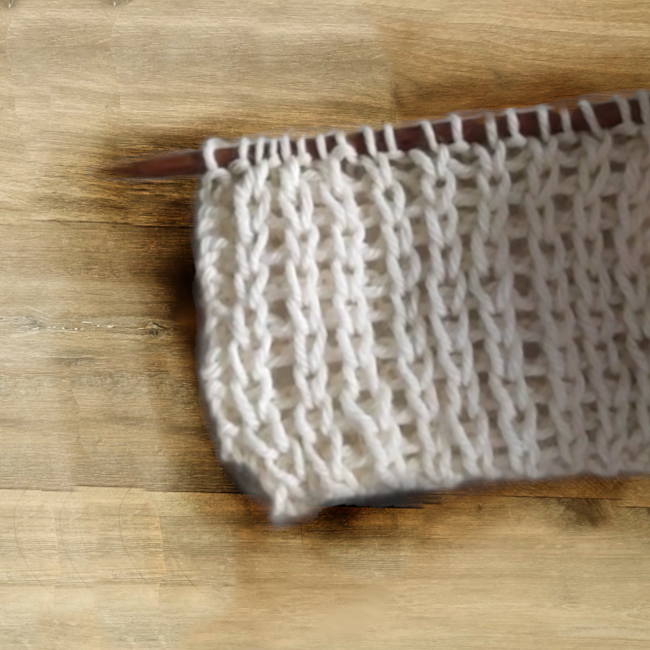
Half Fisherman Stitch or Shaker Ribs
Link to the Youtube tutorial : https://youtu.be/VVjcaAf2LHw
This is one of the two methods used to create wide, thick, and elastic ribs. It has the particularity of starting on the wrong side and requiring knitting into the stitch below on the right side. Specifically, this means that on the right side row, the stitches presenting as purl are purled. Those presenting as knit are not knitted into the stitch on the needle but into the stitch from the row below. Personally, I prefer this method to its counterpart, the Brioche stitch, which we will see next. It is more accessible to beginners and is less confusing while still yielding a very nice result. Indeed, this ribbing method is not really meant to be used alone but rather as a decorative stitch associated with classic ribs. It allows for the creation of cozy ribbed sweaters because the vertical lines have a real relief that adds volume to the fabric. Just to give you an idea, this is the method I used for the ribbing at the bottom of the Rose Leaves Sweater.
To reproduce this method:
Row 1 (wrong side): Knit the row in stockinette stitch.
Row 2 (right side): *Purl 1, Knit 1 into the stitch below*. Repeat from * to * and end with 1 purl stitch.
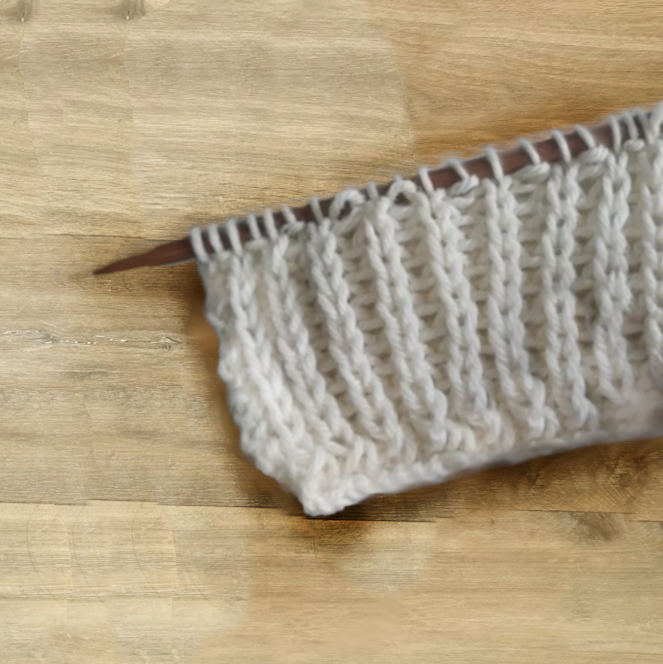
Brioche Stitch
Link to the Youtube tutorial : https://youtu.be/OT33VEnYJQk
This is the second method used to create wide, thick, and elastic ribs. Unlike the Half fisherman stitch, it starts in a conventional way. It has the particularity of requiring a yarn over before each knit stitch on the right side row. On the wrong side row, this yarn over is then knitted together with the purl stitch preceding it. Personally, I struggle a bit more with this method because I always end up getting confused and not knowing where my yarn over is, sometimes knitting it with the wrong stitch. I believe that with practice, it should become automatic, and we should no longer make this mistake! In any case, although in my opinion less accessible to beginners, this technique yields a superb result, with ribs that are well-inflated, generous, and elastic. I don't have a project to show you yet with this type of ribbing, but I promise to remedy that!
To reproduce this method:
Row 1 (right side): *Purl 1, Yarn Over, Slip 1 stitch*. Repeat from * to * until the end of the row and finish with 1 purl stitch.
Row 2 (wrong side): *Knit 1, Purl 2 stitches together*. Repeat from * to * until the end of the row and finish with 1 knit stitch.
Techniques Comparison Chart
All samples were made using 6mm/US10 needles on 21 stitches wide and 20 rows high with the same yarn.
Dimensions are in inches.
| Width | Stretched Width | Stretching coefficient (width) | Height | Stretched Height | Stretching coefficient (height) | Rib Width | Yarn needs | Aesthetics | |
| Classic Ribs | 3,7 | 9,4 | 40% | 3,7 | 7,1 | 53% | 0,2 | = | Medium ribs, purl stitches that disappear under the knit stitches |
| Classic Ribs With Yarn Over | 4,5 | 8,9 | 51% | 3,7 | 7,1 | 53% | 0,2 | - | Fine ribs, purl stitches as visible as the knit stitches |
| Half Fisherman Stitch | 4,9 | 11,0 | 45% | 2,8 | 5,9 | 47% | 0,3 | ++ | Wide ribs, purl stitches slightly less visible than the knit stitches |
| Brioche Stitch | 4,7 | 10,8 | 44% | 3,0 | 5,9 | 50% | 0,3 | ++ | Wide ribs, purl stitches as visible as the knit stitches |


There is no comment yet.
Add a comment