The base idea
Have you ever looked at a poorly made store-bought sweater and thought, "I could totally make this, but better, and I'd know how it's made?"
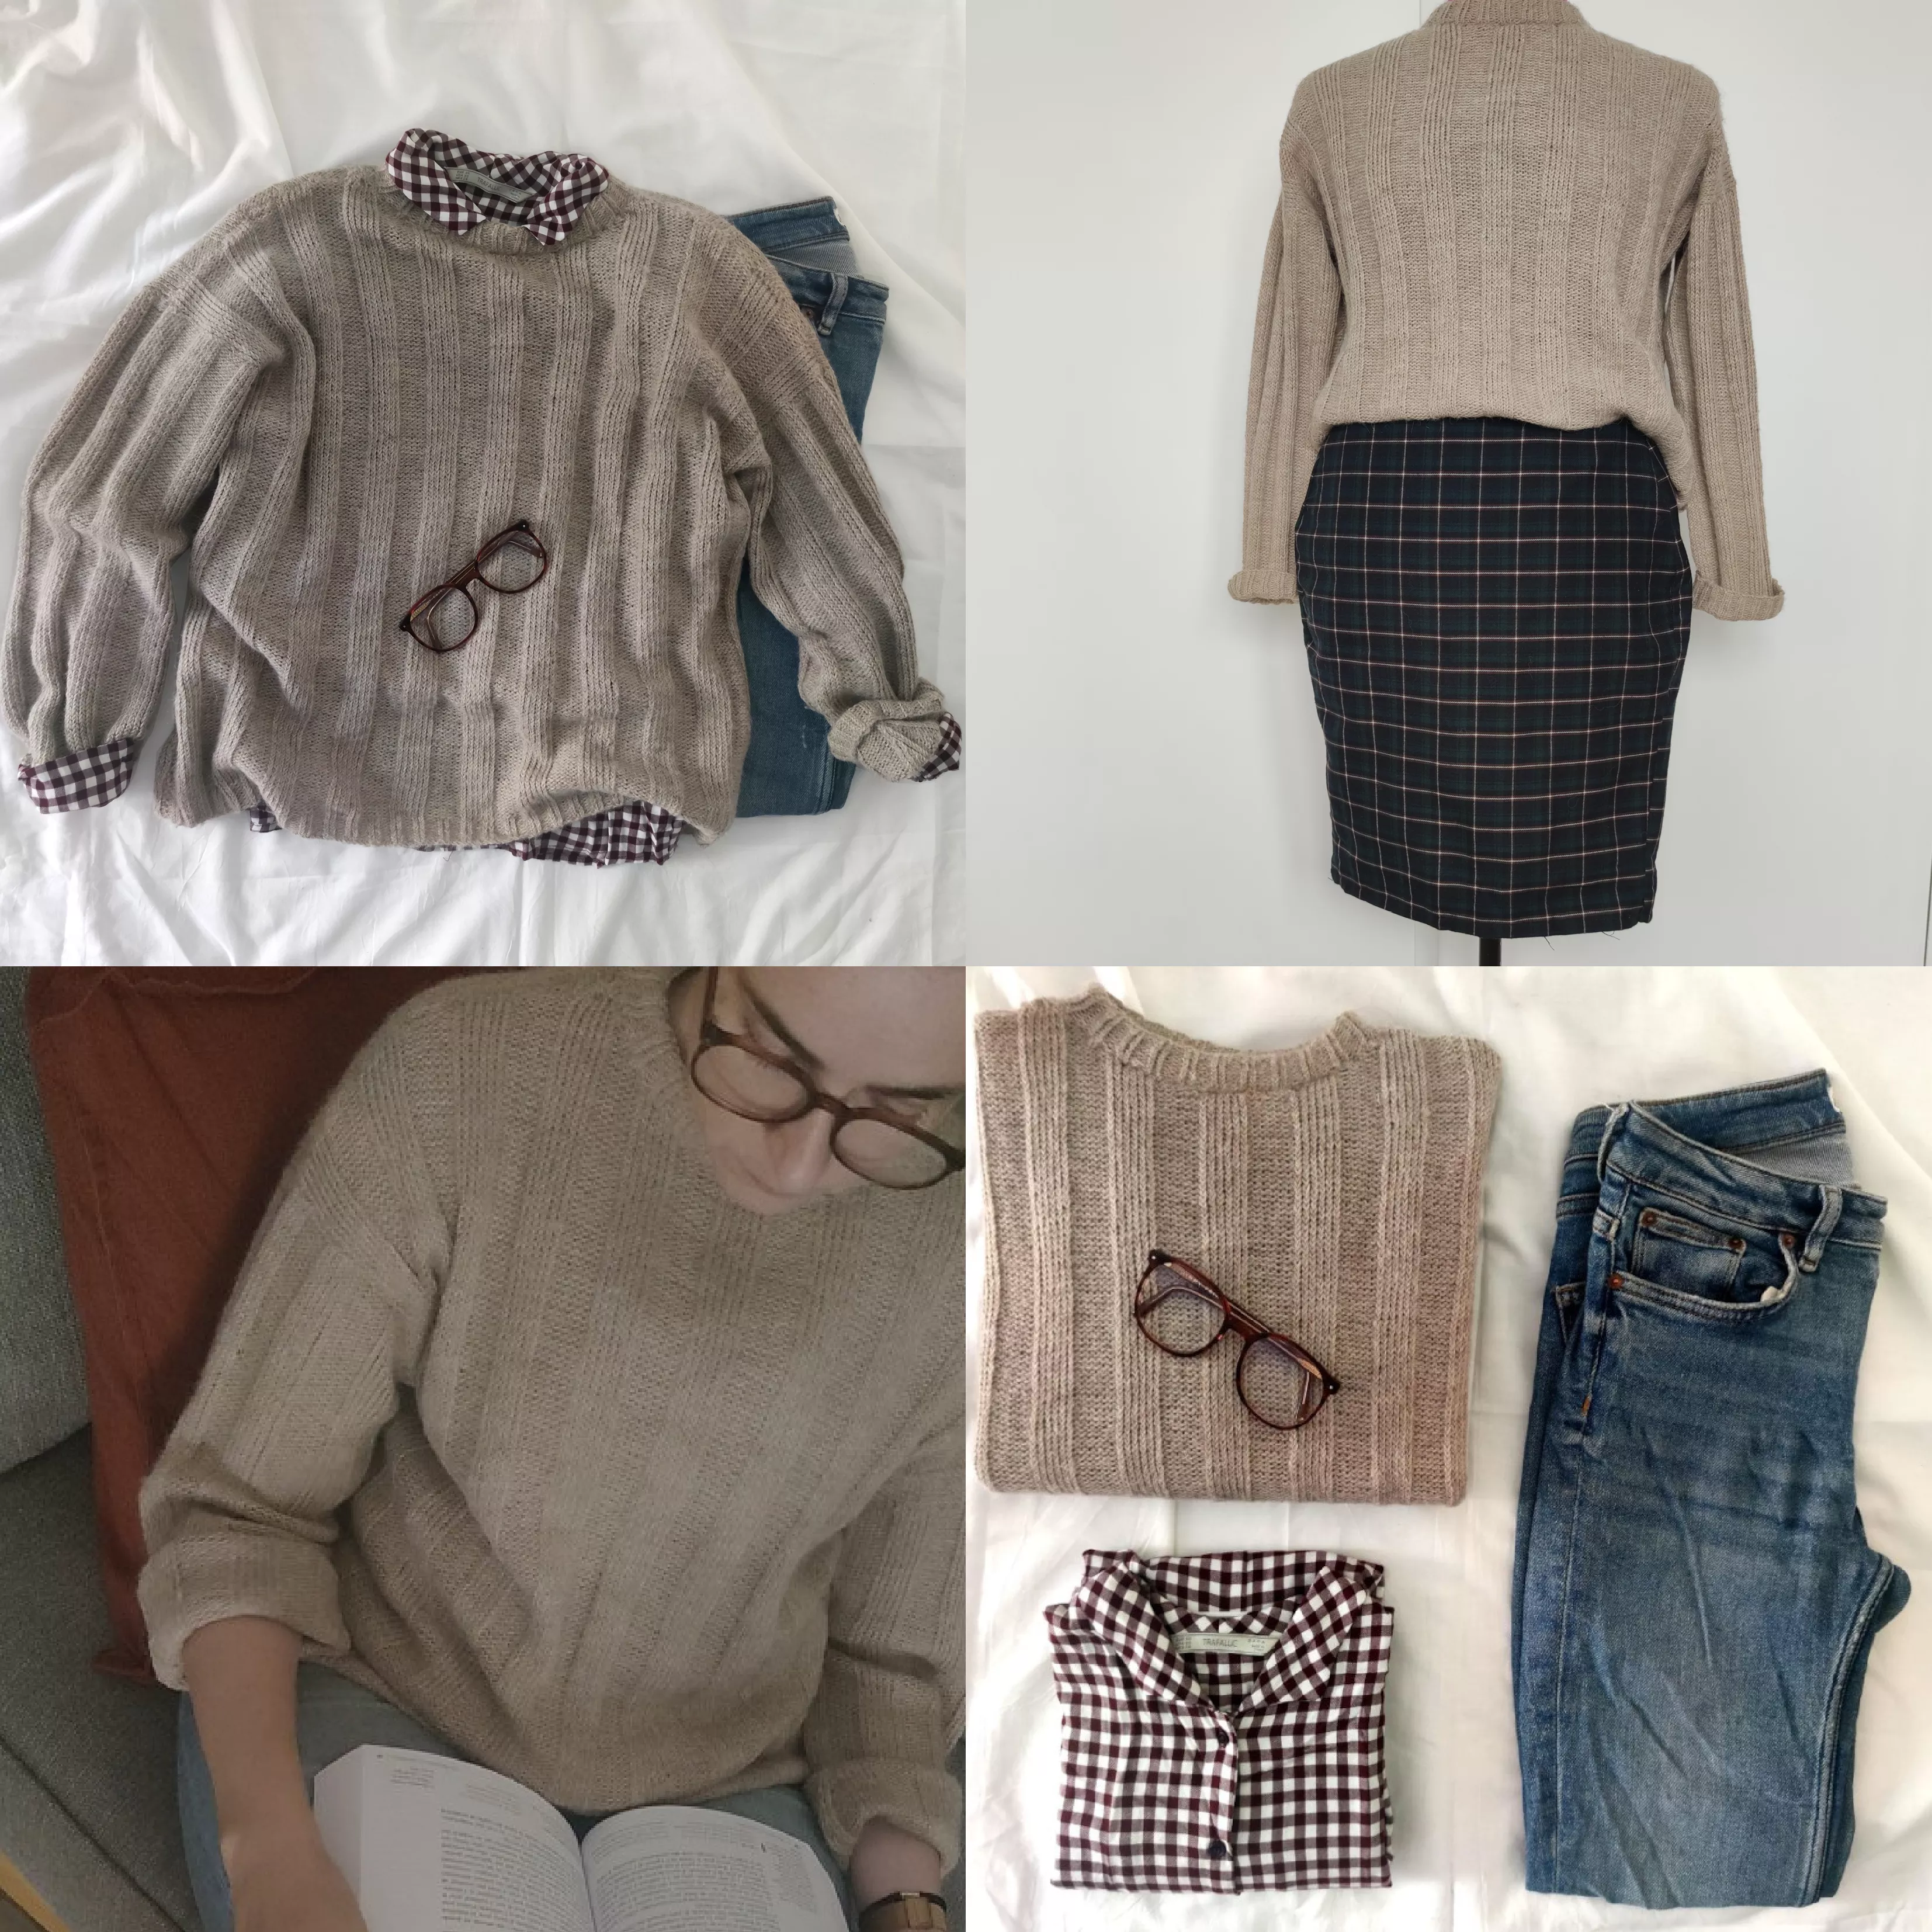
Well, it was this thought that led me to create my first homemade pattern. I had spotted a basic, straight-cut sweater with wide ribs in a store, but it was made from plastic materials.
I thought to myself that I could definitely try to make my own version, but with quality material, my favorite being alpaca.
Reproducing a pattern
To create this design, I started with some basic questions: What shape did I want my sweater to have? What dimensions should it be? What kind of drape did I prefer?
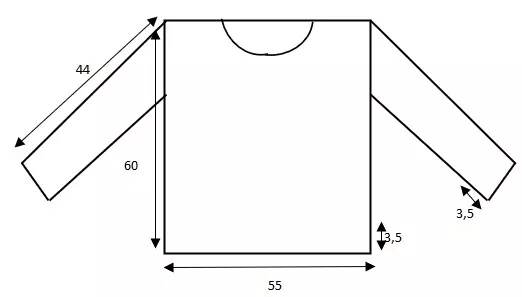
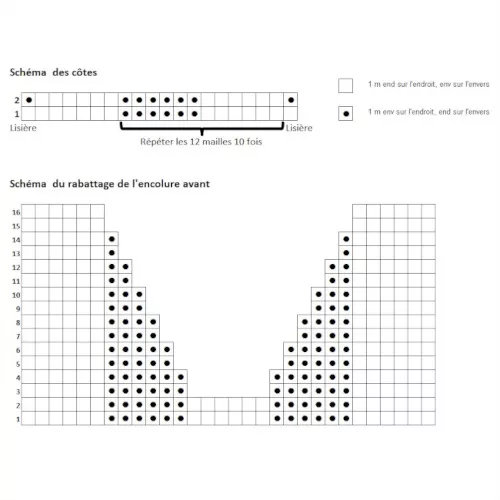
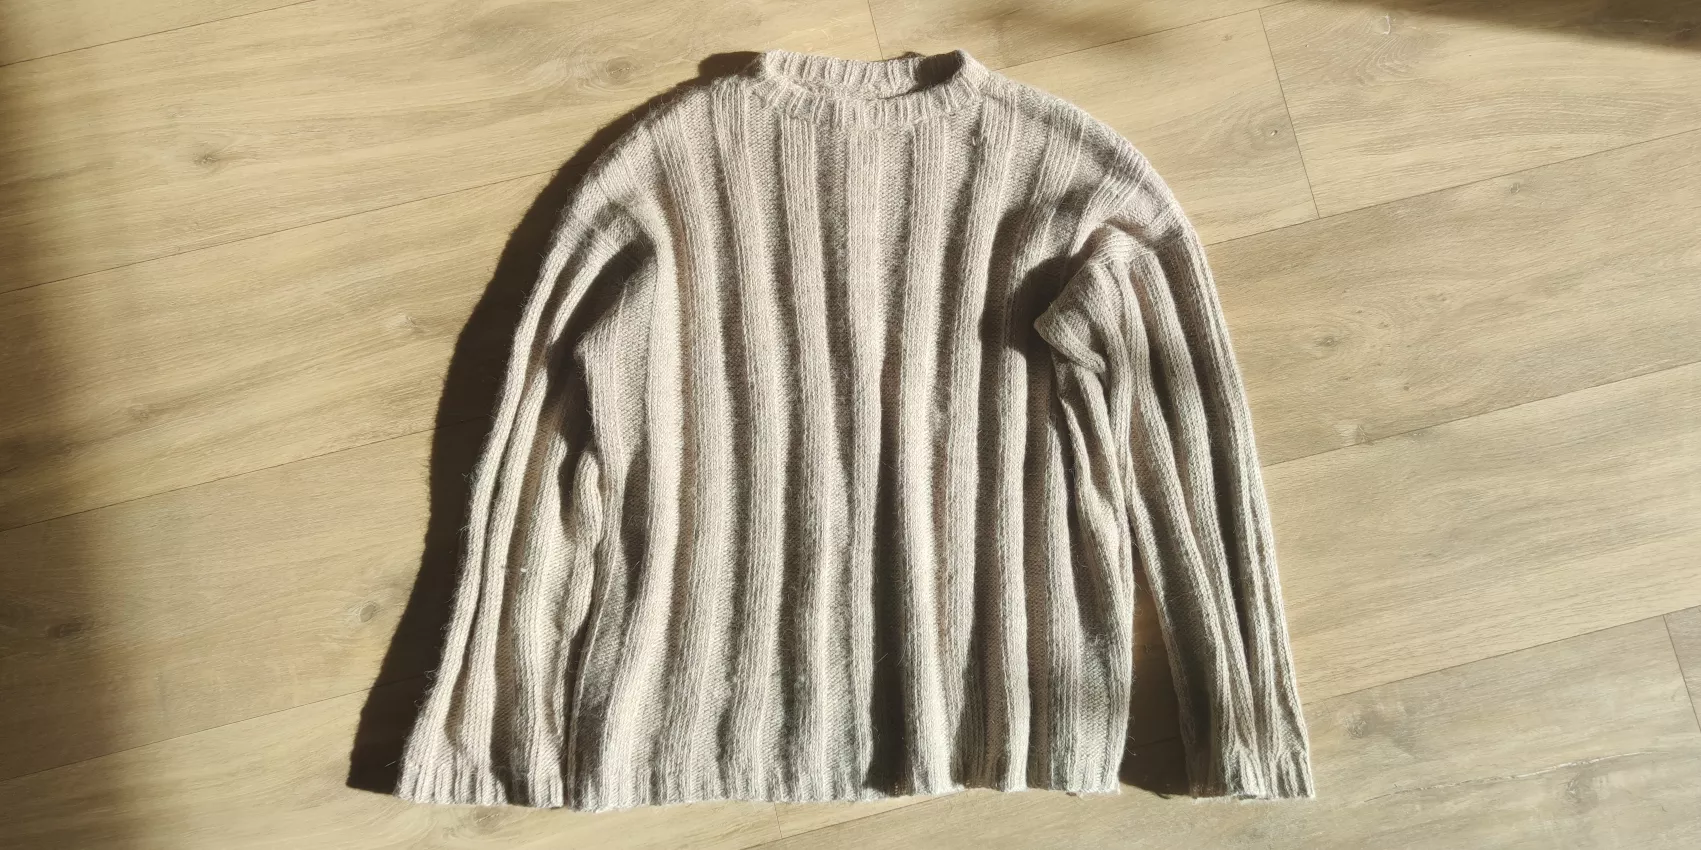
Based on these considerations, I decided on a simple rectangular design for a "boyish" look, using 3.5mm/US4 needles for a delicate and supple finish. I wanted the ribs to be quite wide, so I chose a 6/6 rib pattern. By measuring sweaters that had the desired look, I determined the target dimensions for my sweater and calculated the number of pattern repetitions I would use for the body and sleeves.
The details
In the end, I created :
- Two rectangles, each with 128 stitches in width for the body, which is equivalent to 10 repetitions of the 6/6 rib pattern, plus one row of stockinette stitch on each side for easier assembly. The front rectangle is rounded at the top for the neckline (see diagram below), and I included one edge stitch on each side. The rectangles start with 10 rows of 2/2 ribbing using 3mm/US2 needles.
- Tubular sleeves with 96 stitches picked up on each side of the body, equivalent to 8 repetitions of the 6/6 rib pattern. They end with 10 rows of 2/2 ribbing using 3mm needles.
- A doubled collar with 10 rows of 2/2 ribbing picked up on the rectangles. Specifically, I picked up stitches and worked 10 rows of 2/2 ribbing, followed by one purl row and another 10 rows of 2/2 ribbing. Then, I folded the collar inward and added a thin elastic inside to prevent it from stretching out.
The result
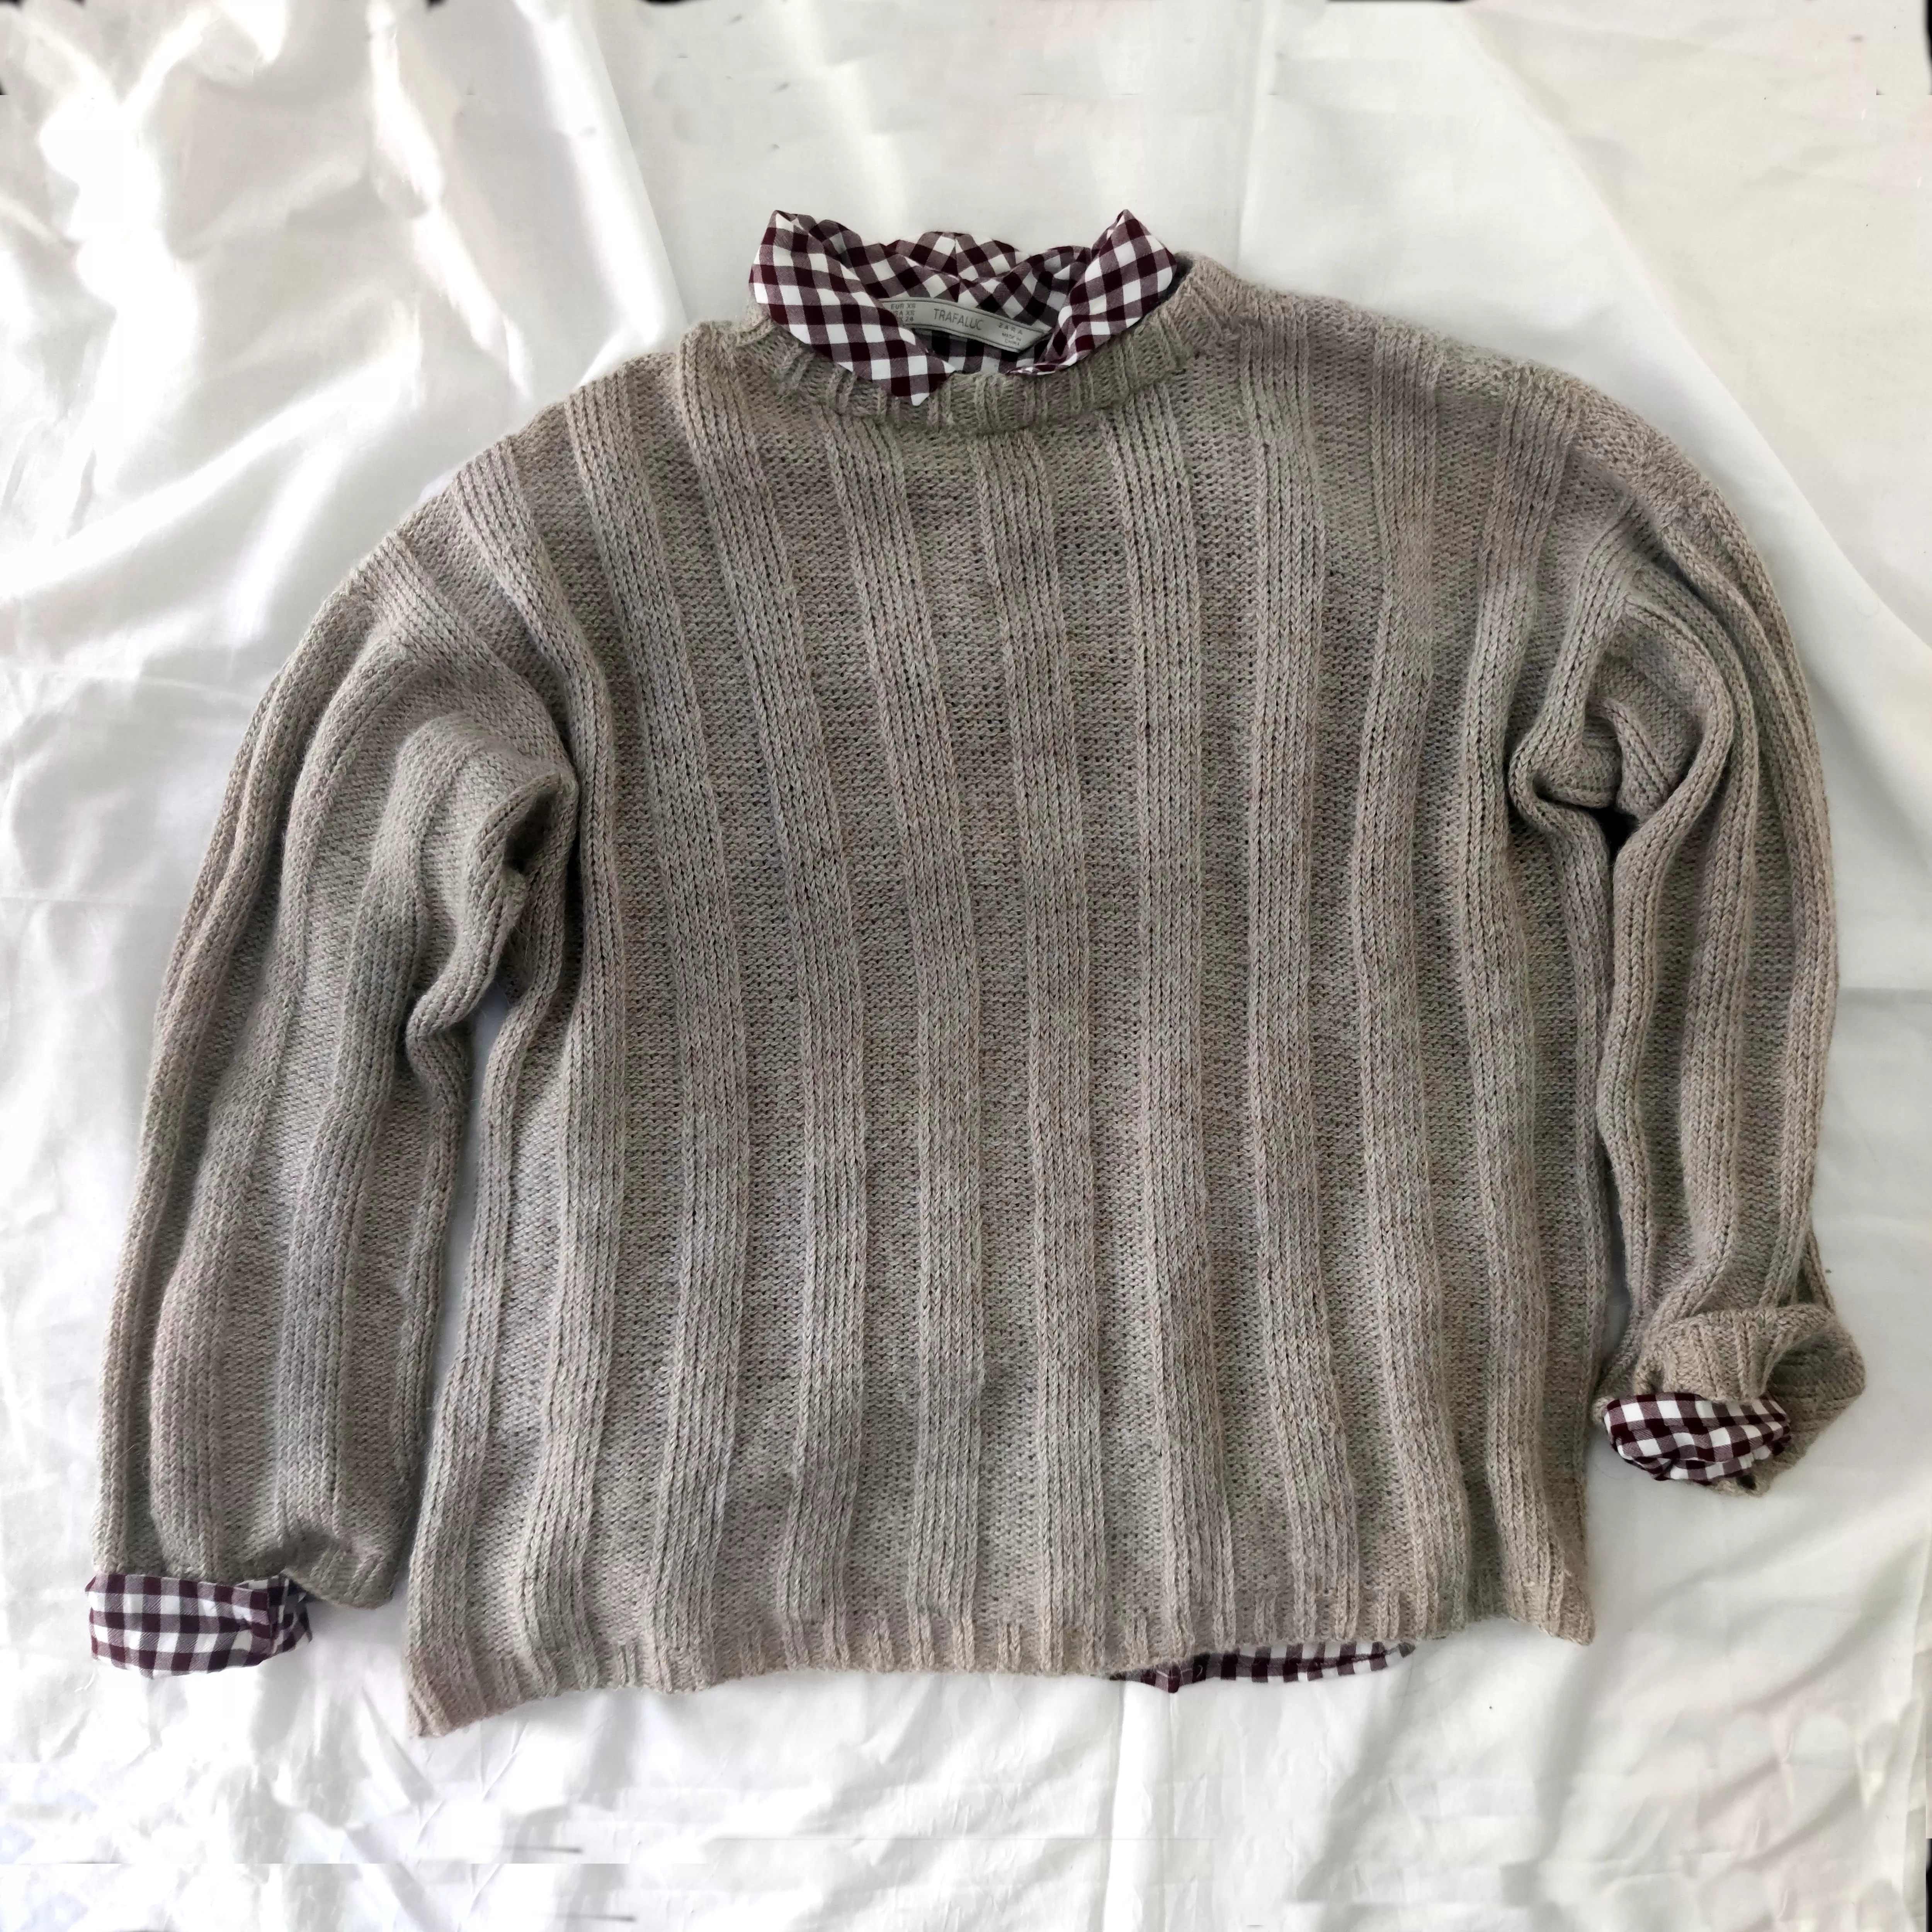
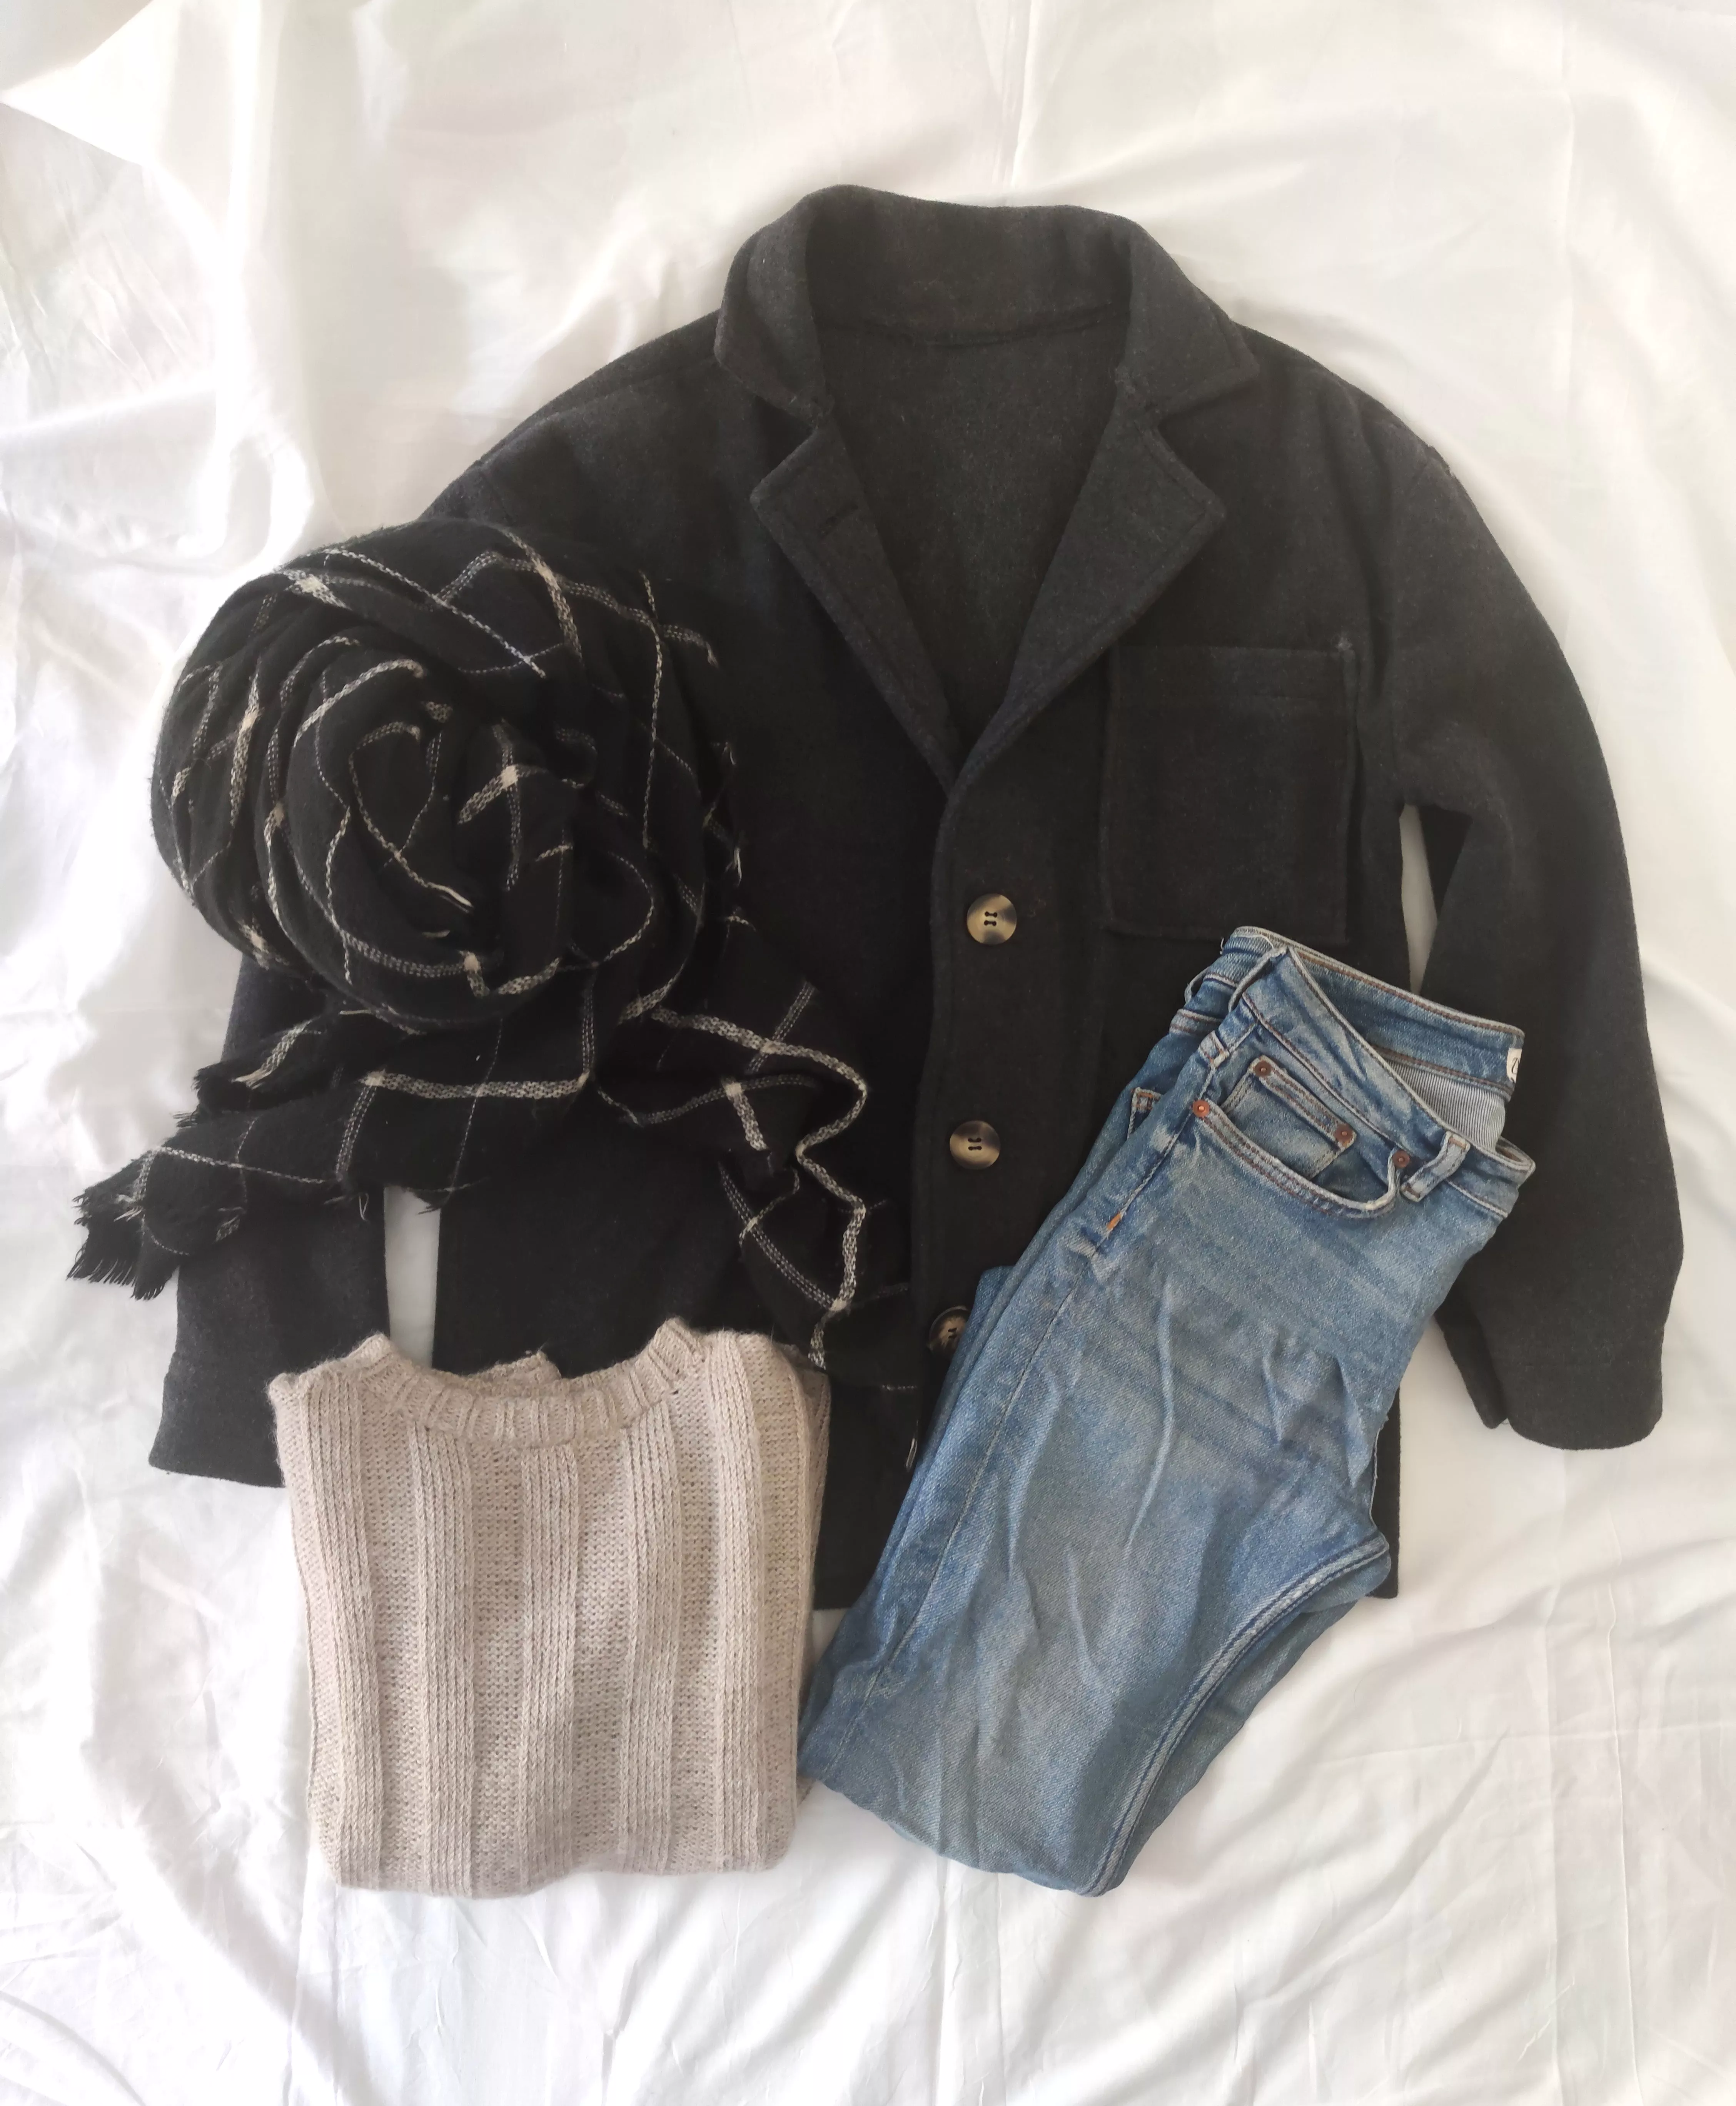
I am very pleased with the result, and the outcome matches what I had in mind. The use of alpaca gives it a fluid and light drape, allowing me to wear this sweater either on its own or as an extra layer in case of cold weather, paired with a overshirt, for example.
Don’t forget to tag me on Instagram, Facebook or Tiktok #terrifiknits and #BasicWideRibbedSweater or #pullacoteslargesbasique once you're done or add this project to your Ravelry list ! Can't wait to discover your version !
My takeaways from this first experience :
- Recreating your own version of a store-bought model is quite simple, either by starting from an existing pattern that you adapt or from scratch for the most basic designs.
- Wide ribs tend to create a "wavy" effect when worn and may not lie as flat as a store-bought sweater.
What you'll need :
Knitting pattern: download the instructions by clicking on the button bellow
Wide Ribbed Sweater Terrifiknits (PDF, 683.73 KB)
All my patterns are available for free.
So dont forget to show your support by subscribing to any of my social medias !
You'll help increase the visibility of my work...
You're document will be available in
Your file is availableDownload
Yarn used : Alpaca, color light nougat 2020, Drops
Thank you. Easy peasy.
Thank you so much!
Answer
I was so looking forward to making the perfect sweater for me! It's really beautiful. And so are you for giving away all your hard work and time to produce the pattern. Unfortunately, I saw a big black box under XXXL. If I were good at math, I'd work out the instructions for my size but when even just respectable IQs in math were being handed out, I was standing behind a tree. ❤️🧶❤️🩹
Thank you so much for your kind message!
I have in mind to work on the full size chart as soon as I have the time. Don't hesitate so send me your email on the contact form so I could notify you when it's ready. Maybe you could be my test knitter ;)
Answer
The pattern is not in English....
Hello Mary Jane,
Both versions (French and english) are included in the pdf. You just need to scroll down.
Enjoy!
Answer
Superbe ! Pas encore réalisé mais soigneusement enregistré :) Merci pour le partage gratuit et les explications claires.
Merci beaucoup ! Ravie qu'il vous plaise!
Answer
Add a comment